

Virtual Participation – Imported Participants

Your event organizer has already added you to SpeedNetworking.com, so getting ready takes only a couple of minutes. This guide walks you through logging in, testing your camera and microphone, and moving through each timed meeting round, so you can spend your time making connections instead of figuring out the technology.

Before you start, have these ready

    • Your login details from the invitation email sent by your organizer or SpeedNetworking.com
    • A device with a camera and microphone and a stable internet connection
    • 5 minutes before the start time to log in, find your event and review your meetings

Step 1: Log in to your account

Go to app.speednetworking.com and sign in with the email address and password from your invitation. You’ll land on your personal dashboard.
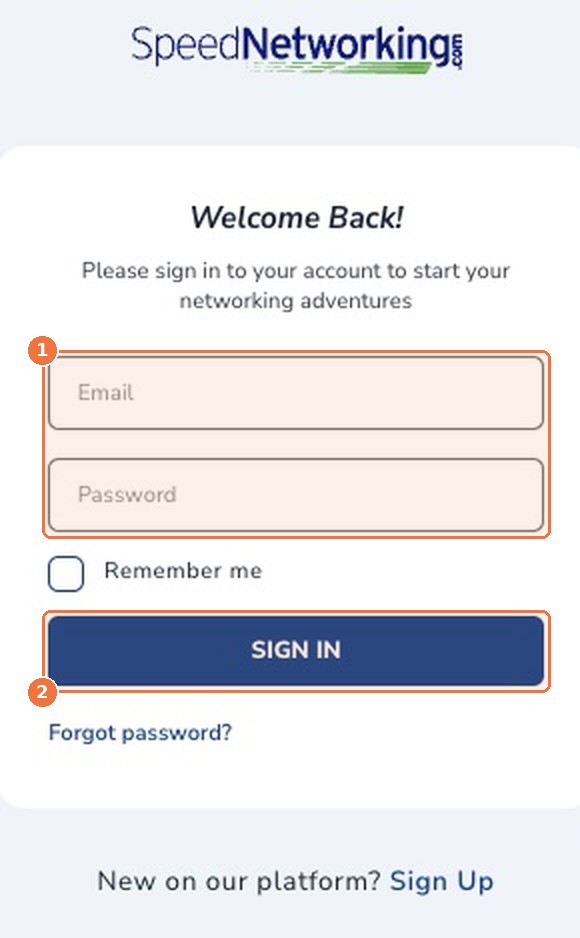
SpeedNetworking.com sign-in screen with the email and password fields and Sign In button highlighted
(1) Enter the email and password from your invitation. (2) Click Sign In.
Tip: Use the same email address your invitation was sent to. Your organizer linked your profile to that email, so signing up with a different one creates a separate account that won’t show your event. If you can’t remember your password, click Forgot password?

Step 2: Find your event

Your event appears under My Events on your dashboard, marked Upcoming. You can also click My Events in the top menu. Select the event to open its page.
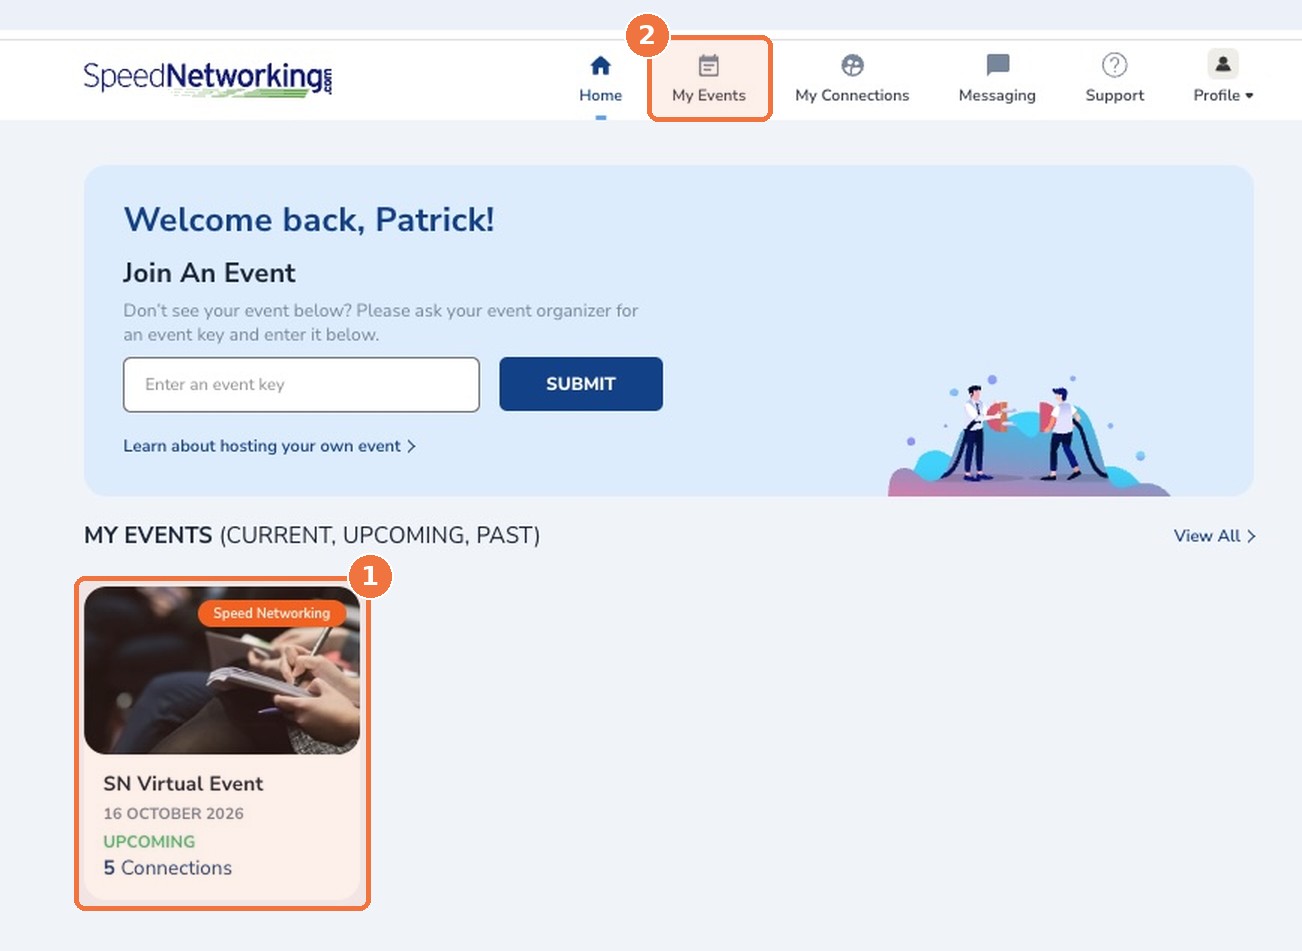
Participant dashboard showing an upcoming virtual event card under My Events
(1) Click your event card, or (2) use My Events in the top menu.
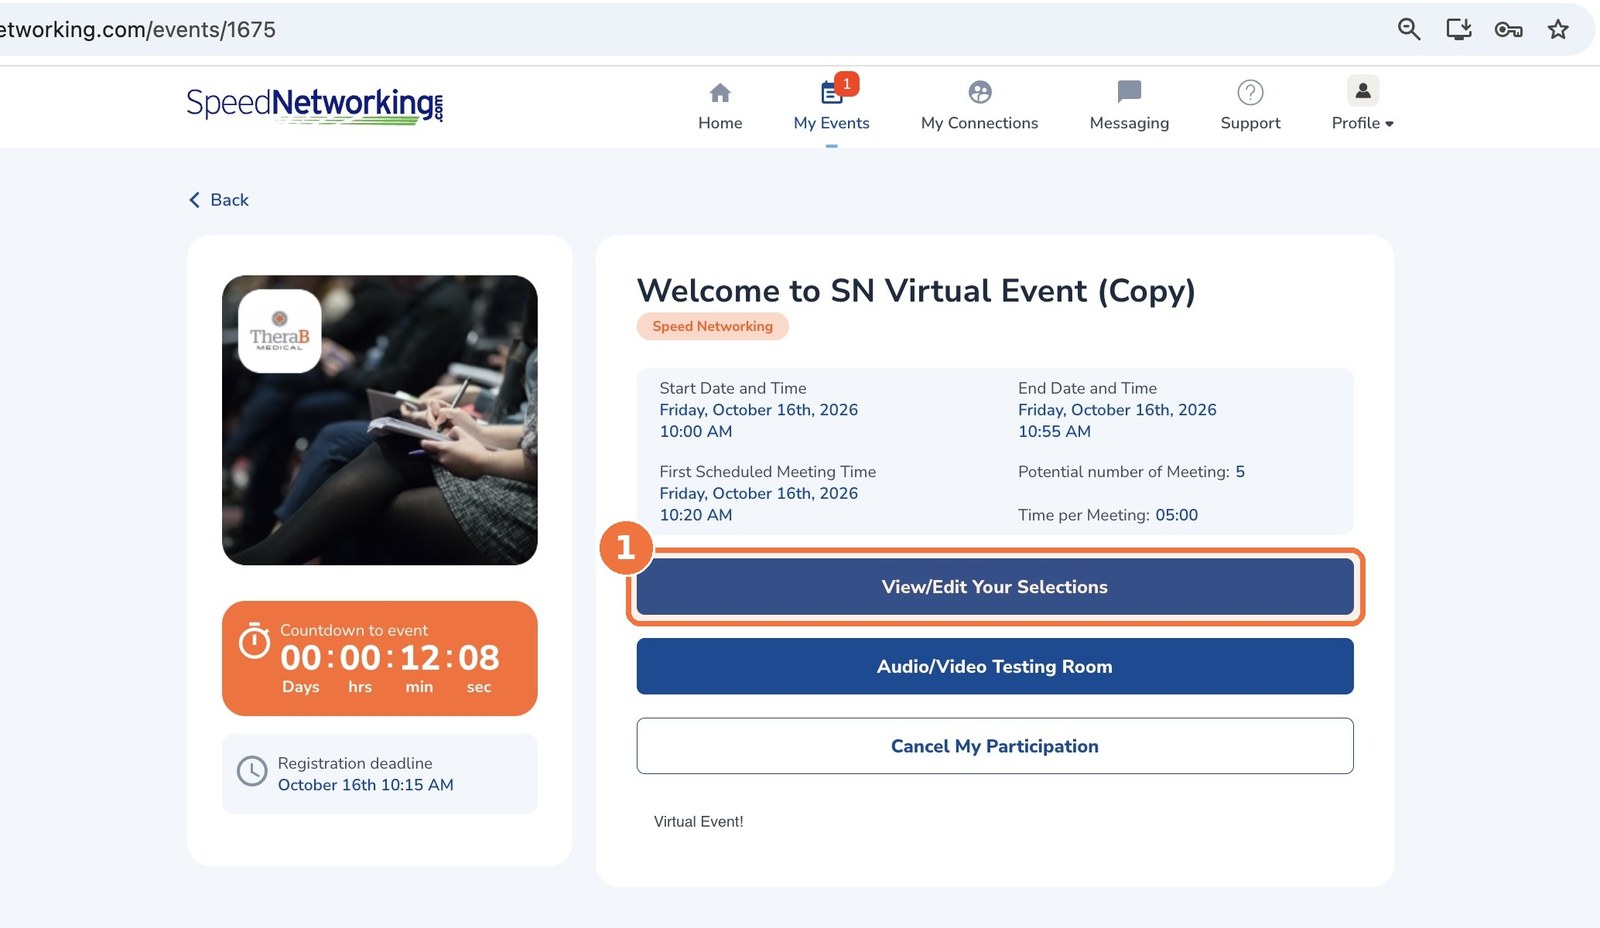
Do I need to register? In most cases, no. Your organizer has already entered your information. If you’re prompted to complete registration, follow the on-screen steps. If your event lets you choose who you’d like to meet, click View/Edit Your Selections to review your choices before the registration deadline.
Event page with the View/Edit Your Selections button highlighted
If your event uses selections, review them here before the registration deadline.
Don’t see your event? Ask your organizer for the event key and enter it in the Join An Event box at the top of your dashboard.

Step 3: Test your camera and microphone

Click Audio/Video Testing Room on your event page and allow your browser to use your camera and microphone. Doing this a day ahead is ideal. It’s the single best way to avoid losing time in your first meeting.
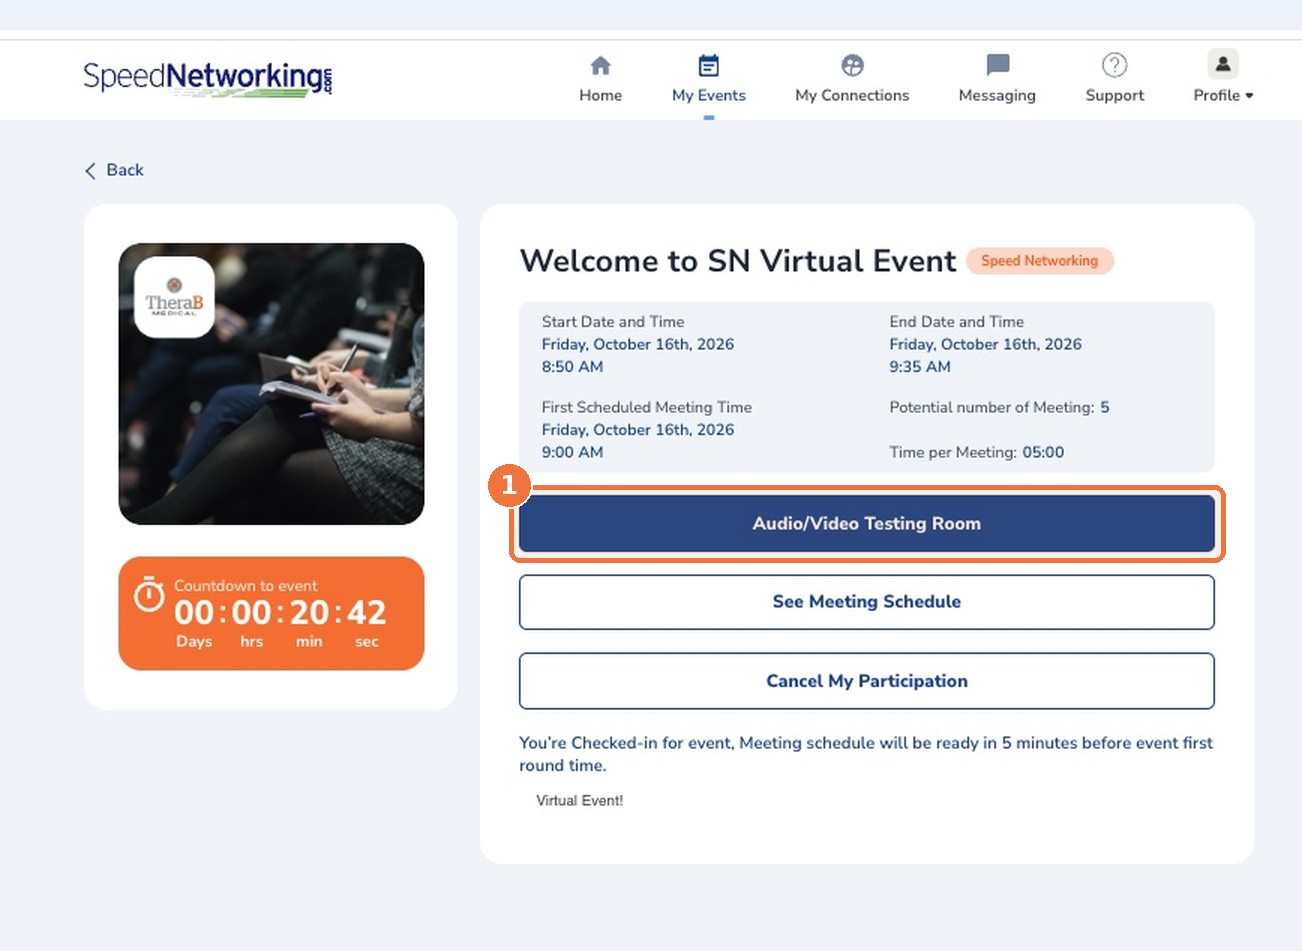
Event landing page with the Audio/Video Testing Room button highlighted
Test your setup before the event starts.

Step 4: Arrive early and open your meeting schedule

The whole event runs on a shared, timed sequence, so every participant moves through each round together. Log in at least 5 minutes before the start time, open your event and click See Meeting Schedule.
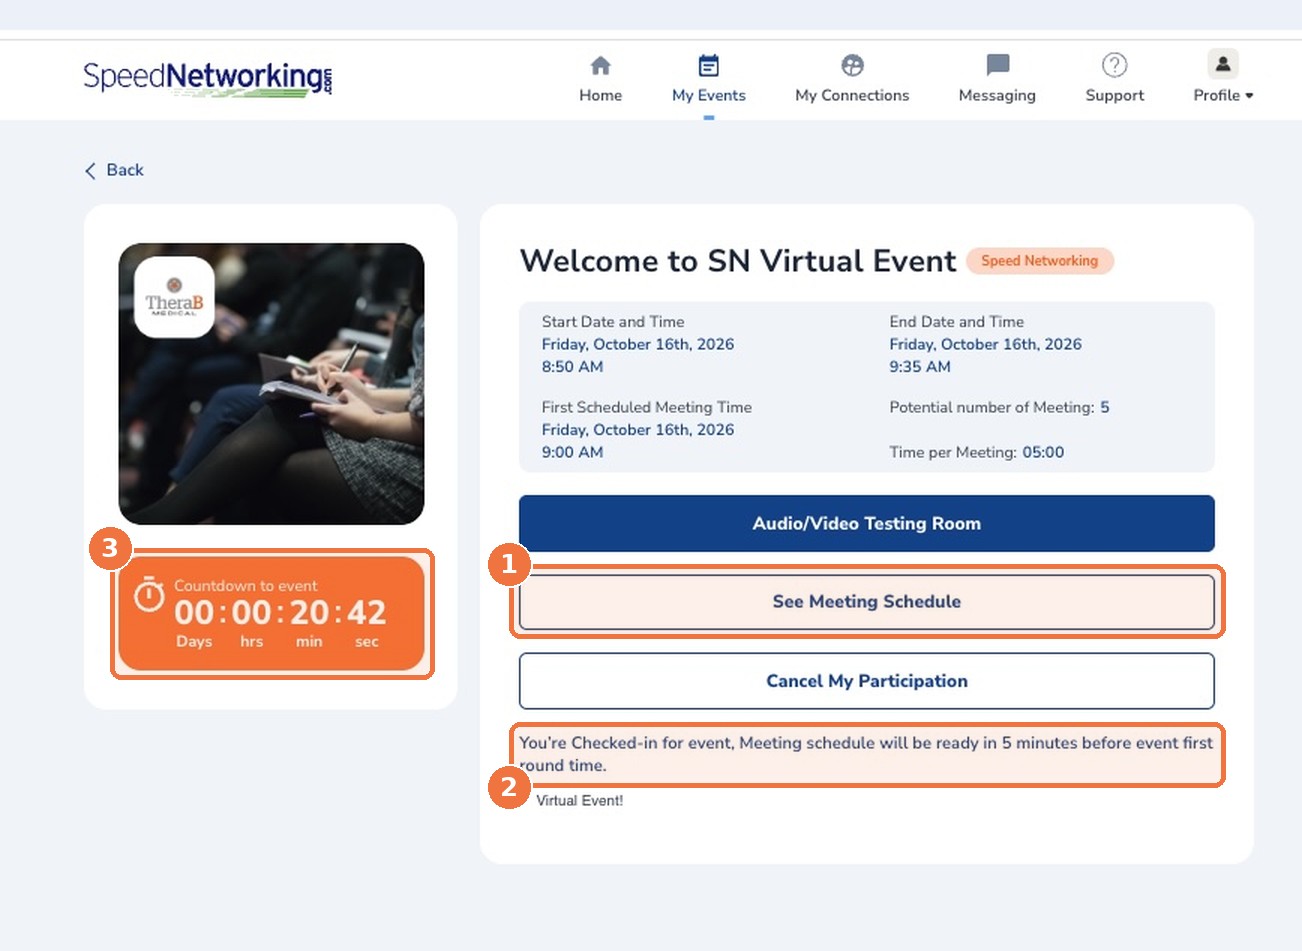
Event landing page showing the See Meeting Schedule button and countdown timer
(1) See Meeting Schedule. (2) Countdown to the event.
Schedule not ready yet? That’s normal. Your schedule becomes available about 5 minutes before the first meeting round. Wait a minute and refresh the page.

Step 5: Review your meetings and watch the timer

Your schedule lists each person you’ll meet, in round order, with their company, title, background and areas of expertise. The match score shows how closely your profile lines up with theirs, based on the criteria your organizer set. Use these few minutes to plan what you’d like to ask each person.
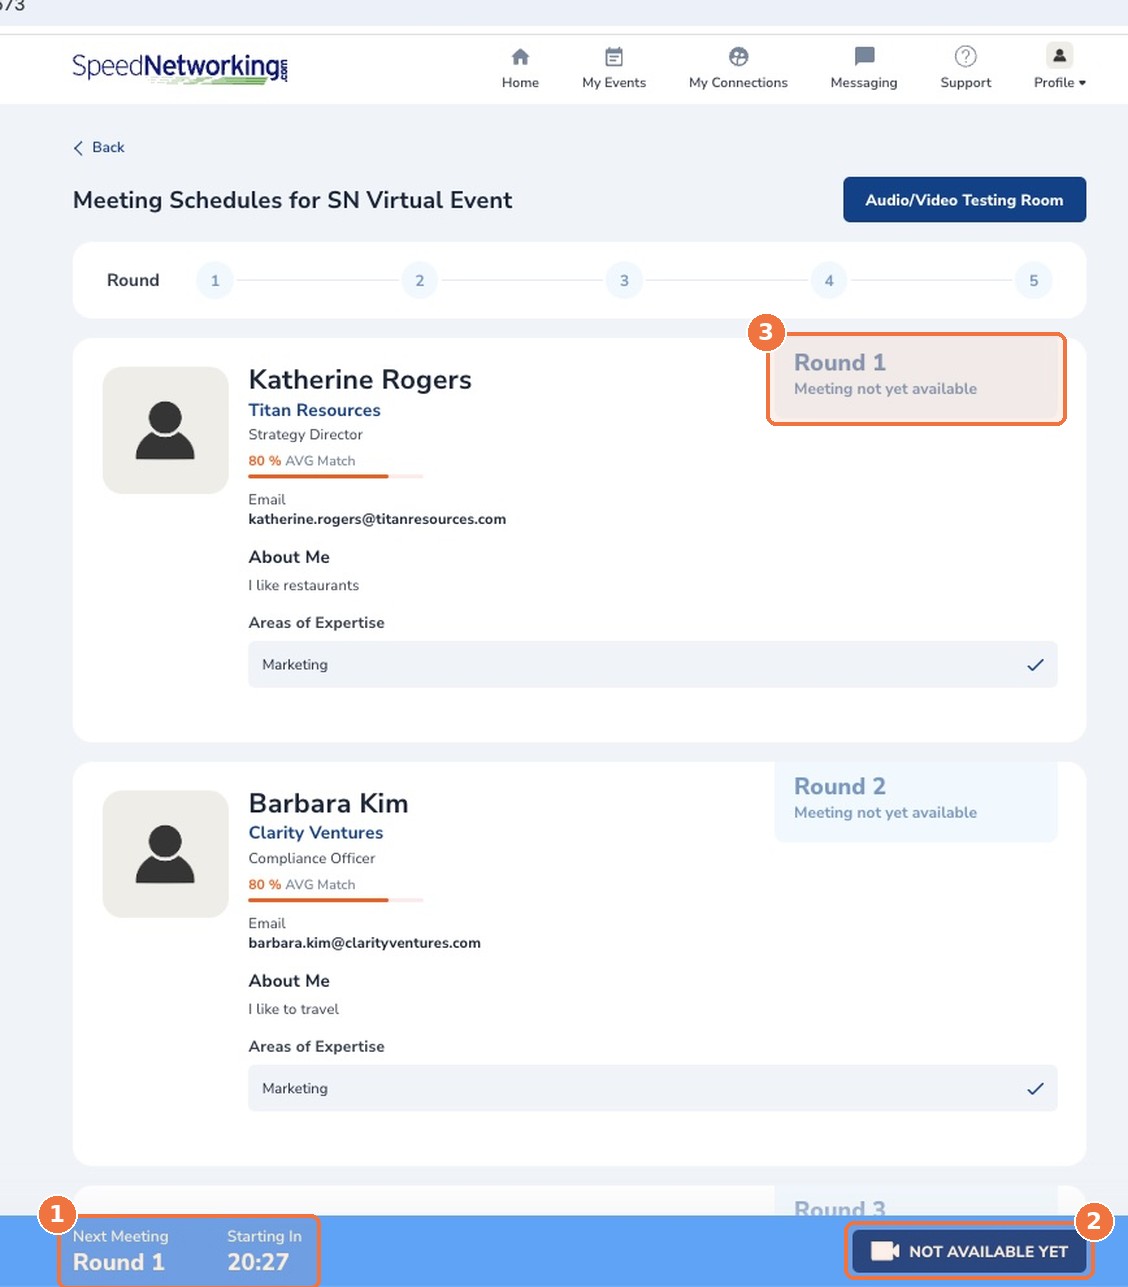
Meeting schedule with the next-meeting countdown bar and round status highlighted
(1) Countdown to your next meeting. (2) The join button, inactive until the round begins. (3) Each meeting’s round and status.
The bar at the bottom of the screen counts down to your first meeting. Organizers often build in a short buffer between the event start time and Round 1, and everyone’s first meeting begins at the same moment.

Step 6: Join your video meeting

When the timer reaches zero, the button changes from Not Available Yet to a blue Join Video Meeting button. Click it to meet your first partner.
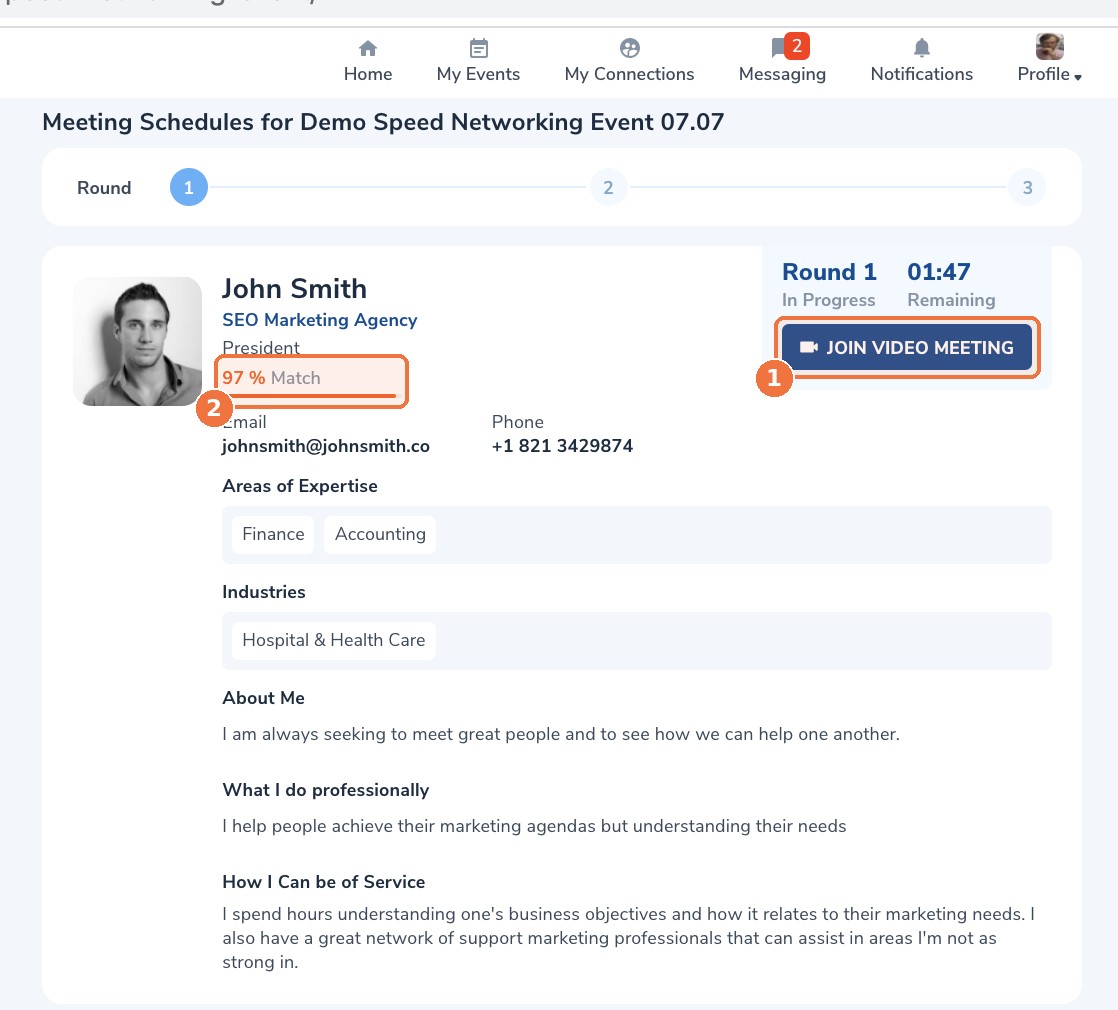

Meeting schedule with an active Join Video Meeting button
Join Video Meeting turns blue when your round begins.
During the meeting, your controls (microphone, camera, end call and screen share) sit under your own video, along with the time remaining in the round. Keep an eye on the clock so you have time to agree on a next step before the round ends.
Live one-on-one video meeting with call controls and round timer highlighted
(1) Microphone, camera, end call and screen share. (2) Current round and time remaining.

Step 7: Give quick feedback, then repeat

After each meeting, you’ll answer a very brief survey. Your partner never sees your responses. You’ll then return to your schedule, where the timer counts down to the next round (often about a minute). Click Join Video Meeting again when it turns blue, and continue until you’ve completed every round. After the event: Contact details for each partner stay on your schedule, and the people you met appear under My Connections, so following up is easy.

Need help?

    • Camera or microphone not working? Check that your browser has permission to use them, then retry the Audio/Video Testing Room.
    • Button or schedule not updating? Refresh the page. Your place in the event is saved.
For more answers, visit our Troubleshooting and Frequently Asked Questions page.

Want to run an event like this for your own group?

SpeedNetworking.com gives organizers of corporate, association, university and conference events a structured way to deliver focused one-on-one meetings, virtually or in person. See how hosting works.