3.0 Divider Events Last updated: October 29, 2021
Divider events bring together two different types of participant. For example, a networking event of buyers and sellers.
The following sections of this chapter discuss how to create an in-person or virtual divider event.
3.1 Setting Up Logistical Information
Once you have selected the Add New Event on the Manage Events page, you will be taken to the first step of the event creation wizard.
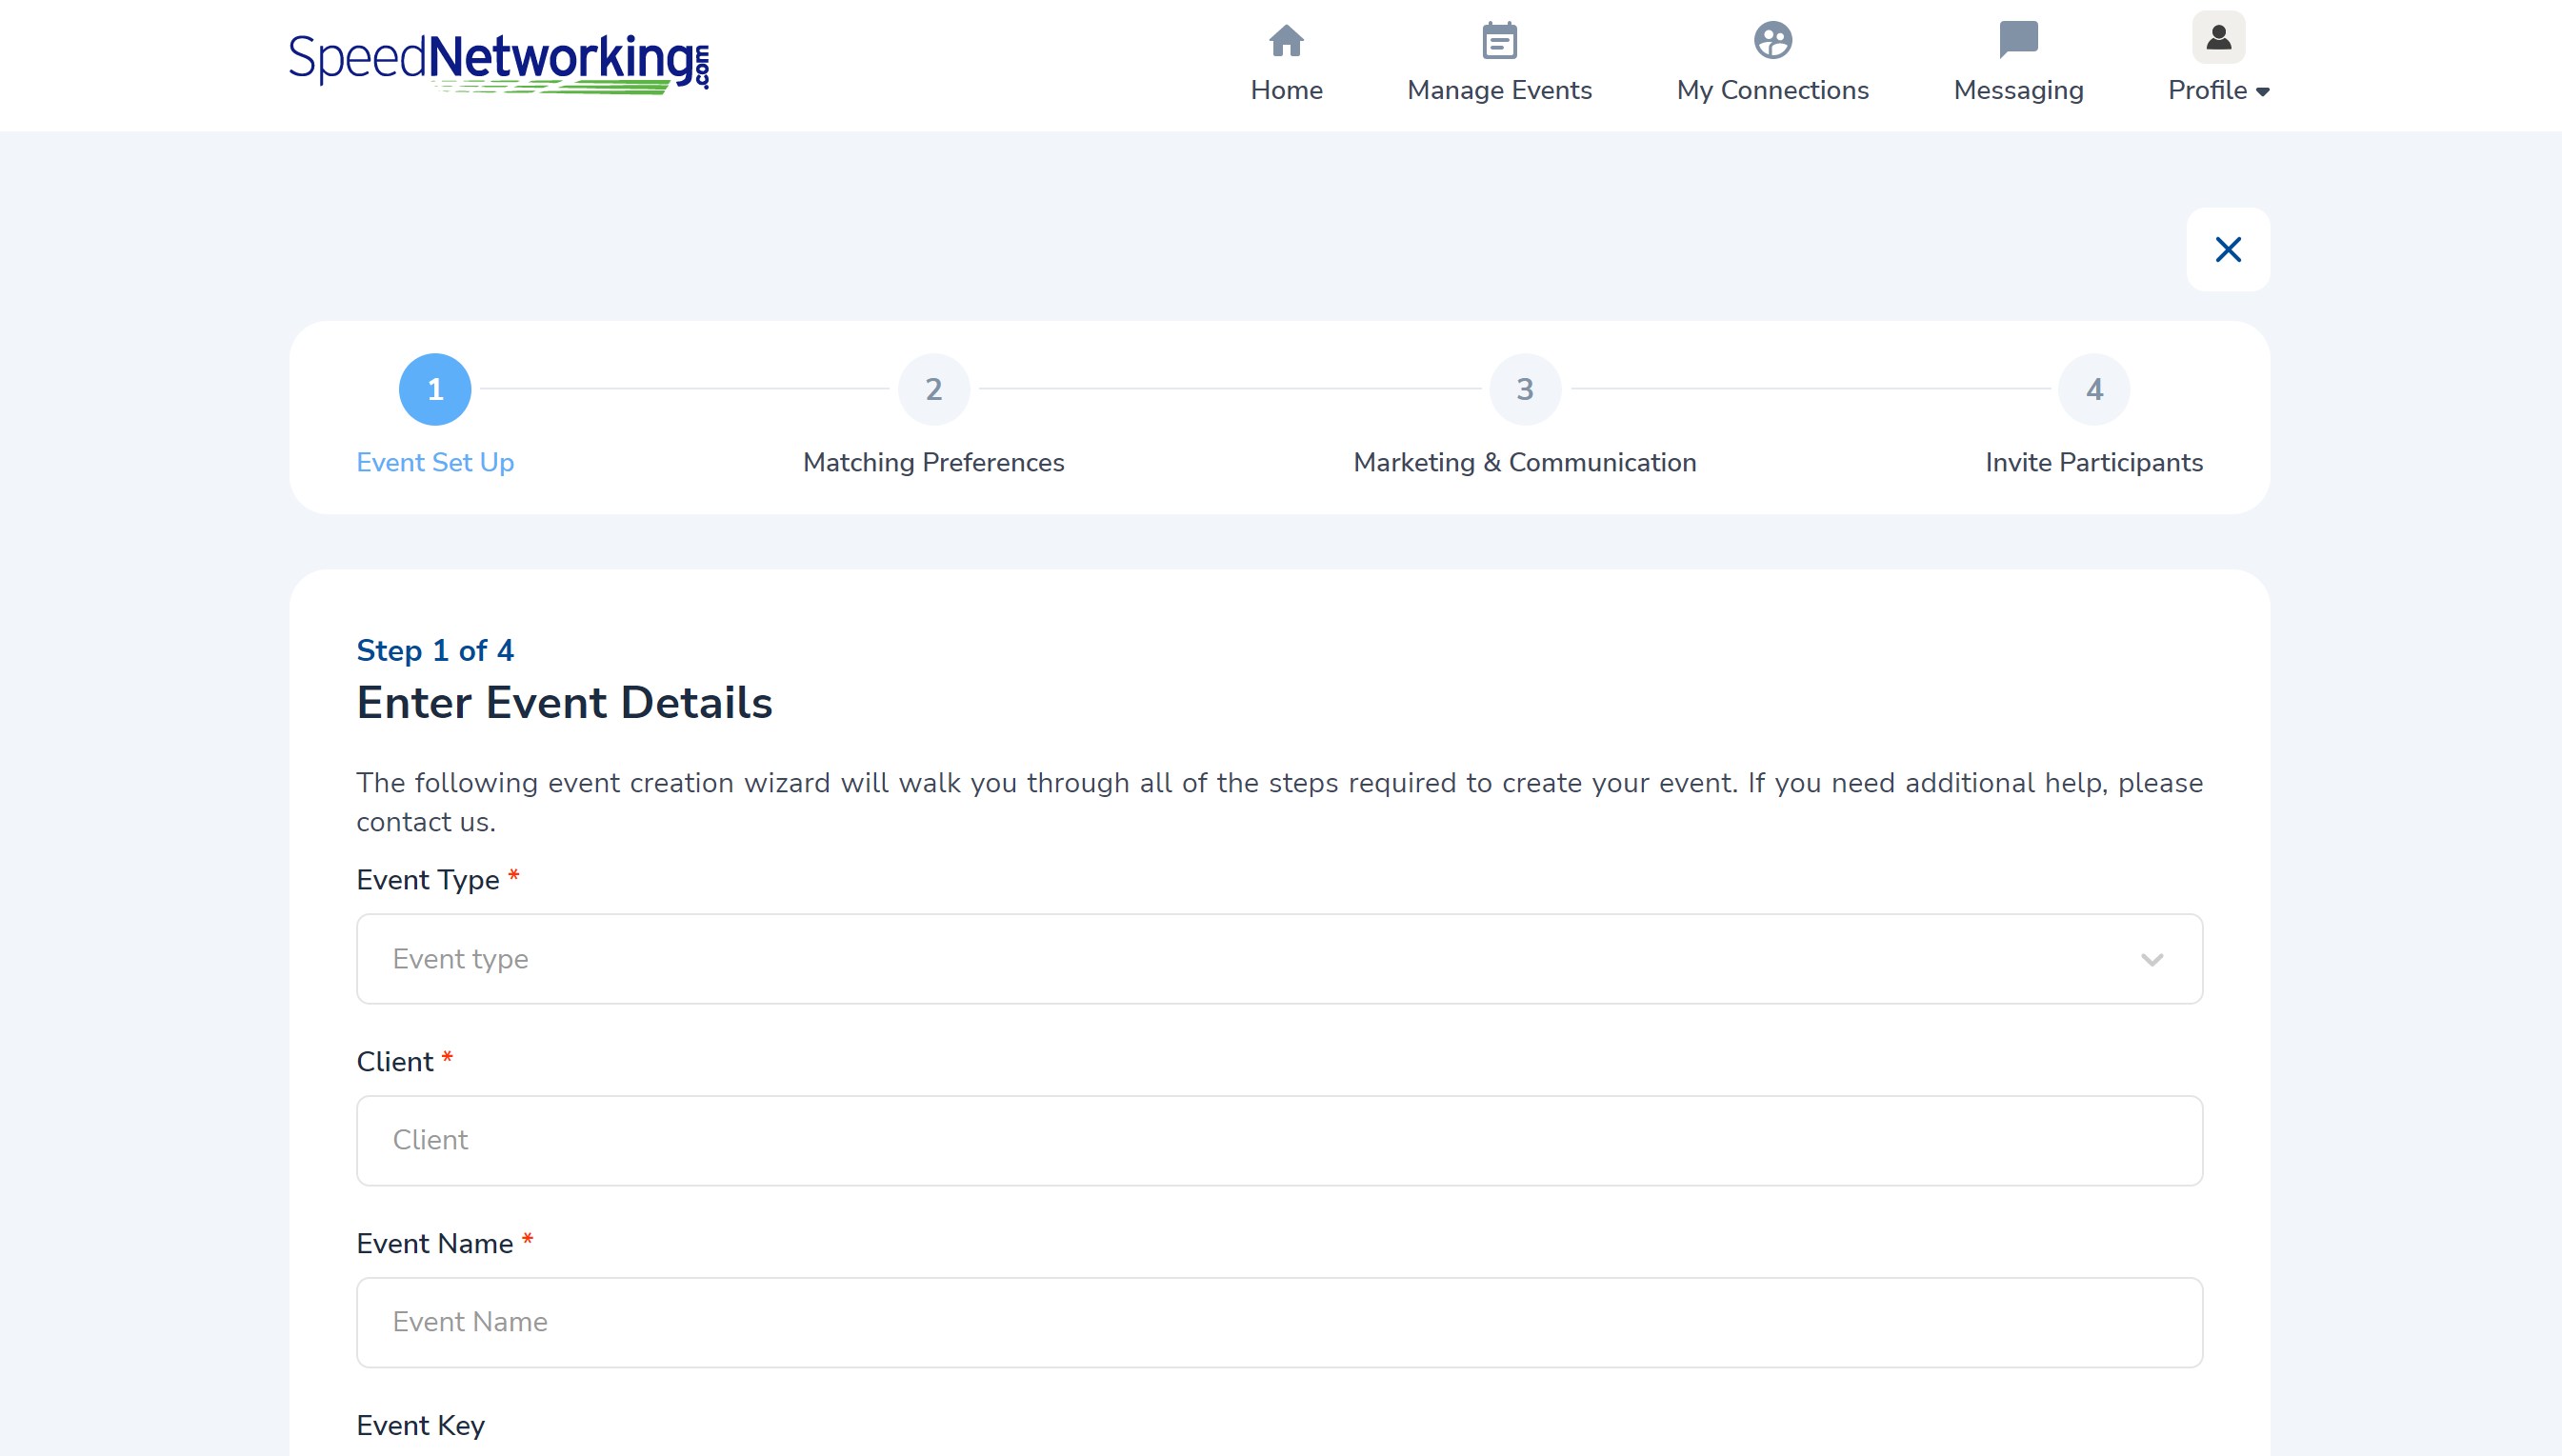
The Event Setup Page allows you to define the logistical information for your event.
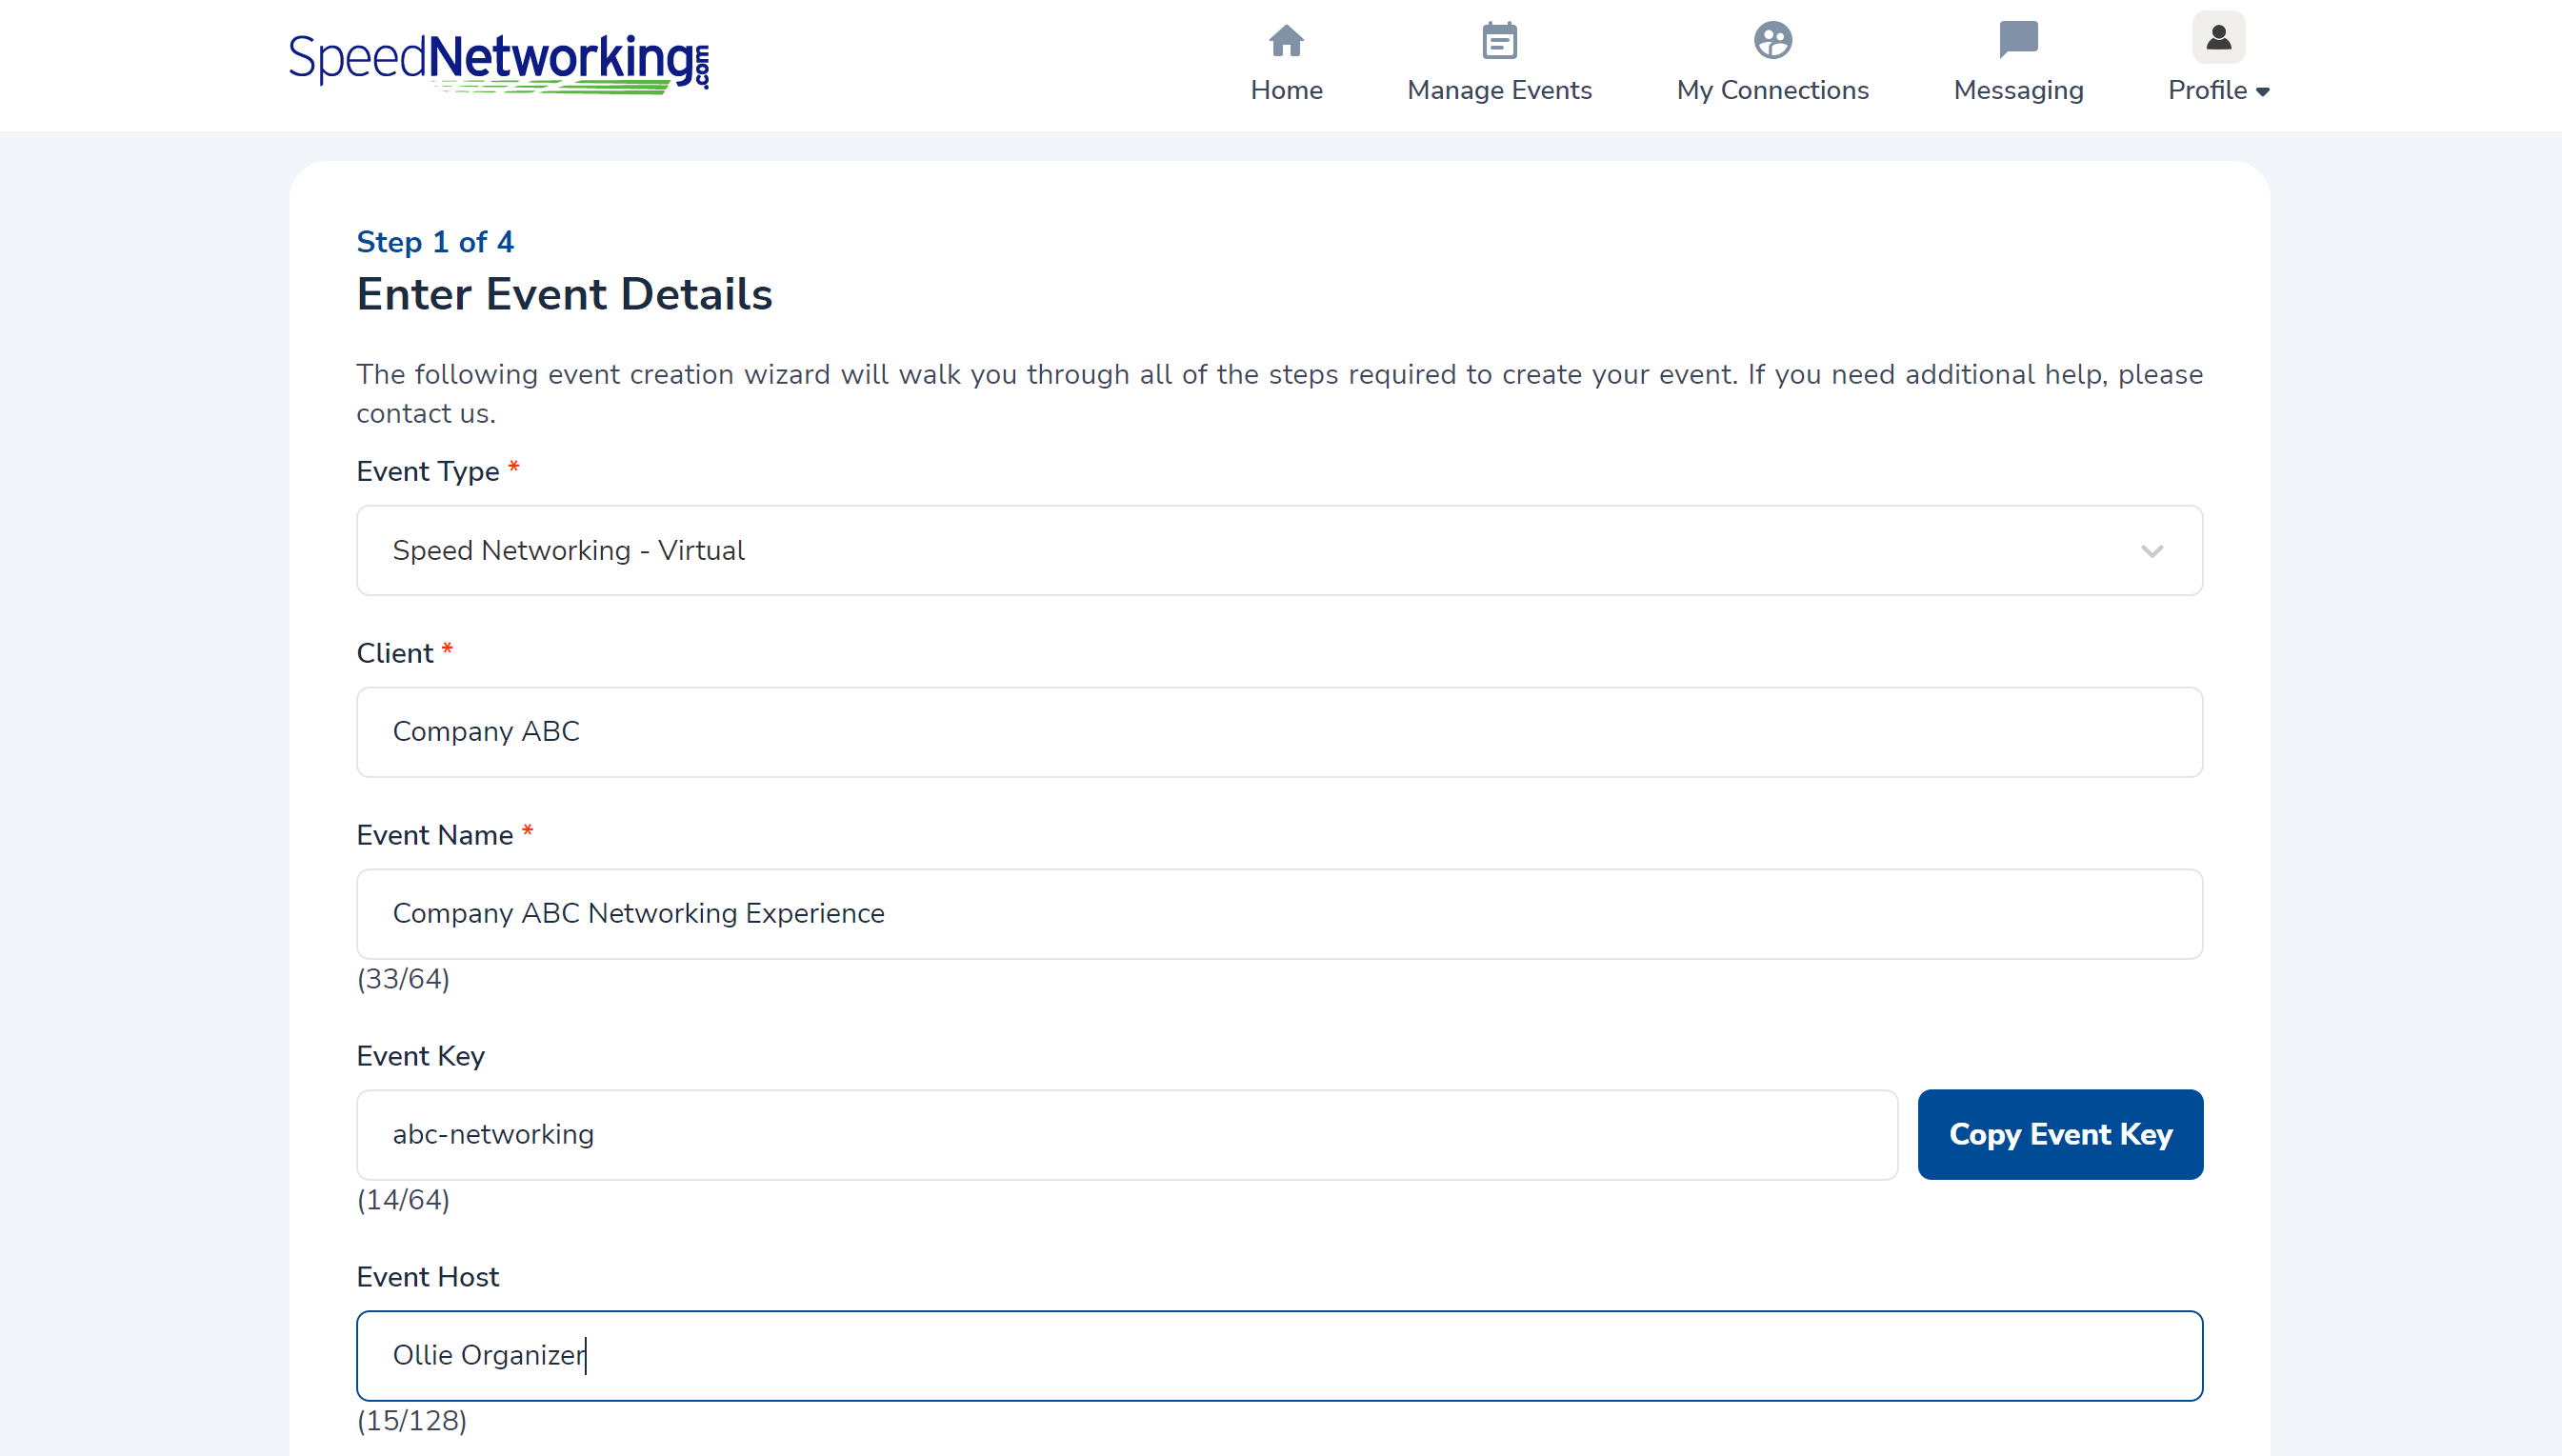
- Event Type - The type of event can be Targeted Connections, Speed Networking - Virtual, Speed Networking - Manual Release or Speed Networking Live In-Person. Please refer to Event Types for more information.
- Client - Enter your company name or the name of your client if you are hosting an event for another company in this field.
- Event Name - Enter the name of your event (i.e. Company ABC Networking Experience)
- Event Key - This is a unique passcode that gives participants the ability to find your event if they did not receive an invitation with a direct link to register. Every event will have a unique event key, and you can customize it to your liking. If you do not enter a value here, the system will automatically generate a key for you.
- Event Host (optional) - Enter an option event host name or company name here.
- Host Email (optional) - If you want participants to contact the host directly if they have questions, place your / their email address here.
- Host Website (optional) - If you want to direct participants to the website of the host or the conference website, you can enter that here.
- Host Phone (optional) - If you want participants to be able to call the host directly with questions, place your / their phone number here.
- Event Sponsor (optional) - If there will be a sponsor(s) for your event, enter the name (of the first one) here. NOTE: If you have multiple sponsors, you will be able to enter the other sponsor information in a later step.
- Sponsor Website (optional) - If there will be a sponsor(s) for your event, enter the website URL (of the first one) here. NOTE: If you have multiple sponsors, you will be able to enter the other sponsor information in a later step.
- Show Welcome video on Schedule Meeting Page - Designed for virtual events, if you would like to display a pre-recorded welcome video to your participants at the start of the event, you can check this box.
- Video URL - If you checked the Show Welcome video on Schedule Meeting page, this option will become visible, allowing you to enter a YouTube or Vimeo link (make sure to include https:) to a pre-recorded video that will play automatically once participants arrive at the meeting lobby (if the event has one - see below) or schedule page (when there is no meeting lobby for the event).
- Do You Want A Meeting Lobby? - Designed for virtual events, checking this box will add a LIVE lobby room to your event prior to the networking sessions.
- This room can be open at any point before the first round of networking.
- The lobby is one-way broadcast communication where participants can see and hear the presenter, but they cannot hear or see each other.
- The presenter cannot see or hear participants either.
- The meeting lobby is designed to offer the host a platform to welcome participants to the event and share any important notes before the networking sessions begin.
- The presenter can make any other participant a presenter if desired by passing the presetner role to anyone in the lobby.
- This is a great way to allow event sponsors to present to the audience as well.
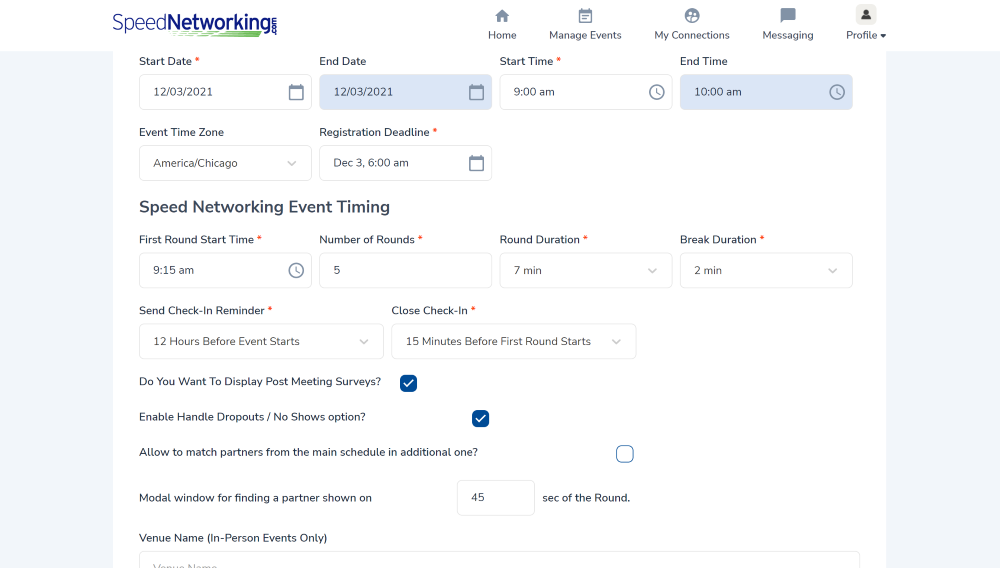
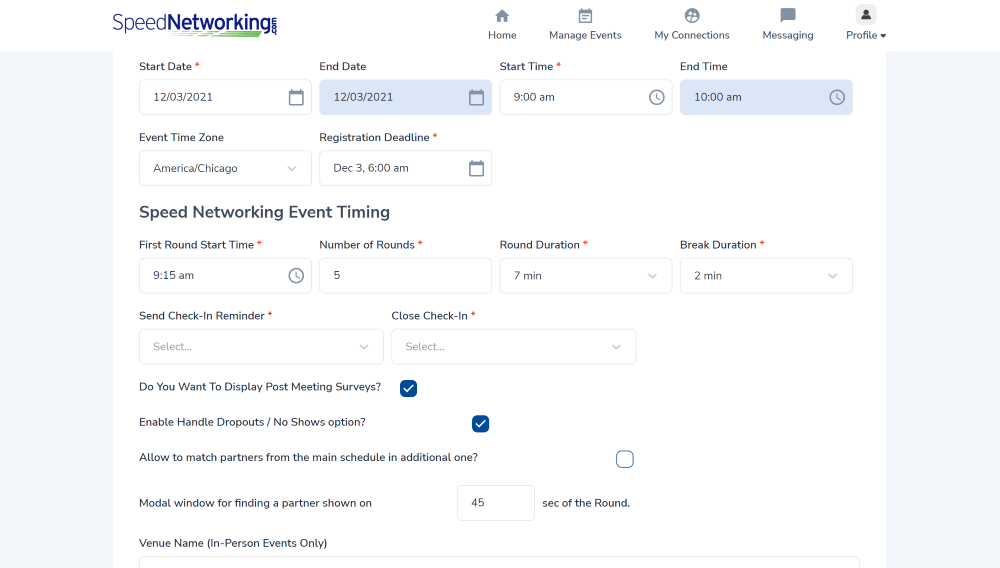
- Start Date - This is the start date for your event and applies to both live and virtual events.
- End Date - This is the end date for your event.
- For Speed Networking events, the date will automatically populate once your event timing section is complete.
- For Targeted Connection events, you will populate this value with the desired end date, which is the last date your partcipants should plan to meet their connections.
- Start Time - This is the time that you would like everyone to join the event. For virtal evnets, this is the time participants should be signed into the SpeedNetworking.com portal with their registration and check in complete.
- Event Time Zone - This is the time zone for wherever the event will be located. This time zone will be used for every time listed throughout the experience, including the distribution of reminder emails / text messages to participants.
- Registration Deadline - This is the date and time that participants must be registered for the event if they wish to participate.
- At a minimum, the registration deadline has to be at least 5 minutes before the First Round Start Time.
- The Smart Matching Algorithms and any matching configurations you set up in a later step of the Event Set Up cannot be run until everyone is checked into the event.
- First Round Start Time - This is the time that the first networking meetings will begin.
- If you are hosting an event lobby, the first round start time should take into account how long you would like for the lobby to be open.
- We recommend having your First Round Start Time be set to 5 minutes after the registration and check-in deadline if there is no meeting lobby in order to give participants ample time to prepare for their first meeting.
- Number of Rounds - This number represents how many networking meetings will take place, and therefore how many connections each participant will make at the event.
- Round Duration - This number represents the number of minutes each round will last.
- You can set this to a maximum of 30 minutes per round.
- The recommended time is typically between 6-10 minutes per round.
- The Number of Rounds multiplied by the Round Duration determines the total amount of time participants will meet.
- Break Duration - After each round, there will be a short break for participants to either fill out a Post Meeting Survey (see below) or prepare for their next meeting. We recommend having a 1 -2 minute break.
- Send Check-In Reminder - The system will automatically send each of your registered participants an email reminding them of the deadline time to check-in to the event.
- You can set this to 6, 12, 18, or 24 hours before the start time.
- You can manually send additional reminders and correspondence from your dashboard.
- Close Check-In - This represents the time that participant check-in will complete, and can be set for a minimum of 5 minutes before the 1st round.
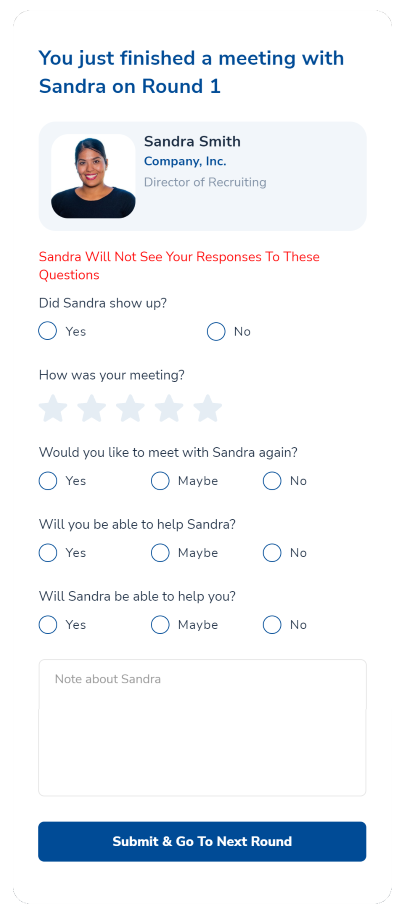
- Do You Want to Display Post Meeting Surveys? - If this is checked, your participants will be able to rank how they thought their individual meetings went and leave any notes for themselves to remind them of anything important about their meeting or connection.
- This is a great opportunity for you, the host, to see how the event is going in real-time during and after the event concludes.
- Participants can review their notes on each new connection anytime after the event.
- Participants surveys are only visible to the person recording the survey and the event host - their connection will NOT see this information.
- The survey questions and comment fields are pre-defined and cannot be changed.
- Enable Handle Dropouts / No Shows Option? - This option applies to Speed Networking virtual events only. If this is checked, you will increase the chances that each participant has a meeting during each scheduled meeting time.
- We do our best to help you ensure all registered participants attend the event by sending out scheduled reminders.
- If a participant checks-in but does join a scheduled meeting prior the specified amount of time (see below), this option will automatically have the the SpeedNetworking.com algorithms look for other participants in the same situation.
- If there is at least one other participant without a meeting or with a no show during this time, they are eligible to be repaired.
- Allow to match partners from the main schedule in additional one? - If the Enable Handle Dropouts / No Show Option is selected, this option allows participants to be paired with another participant that they are scheduled to meet in a later round. This is not typically selected.
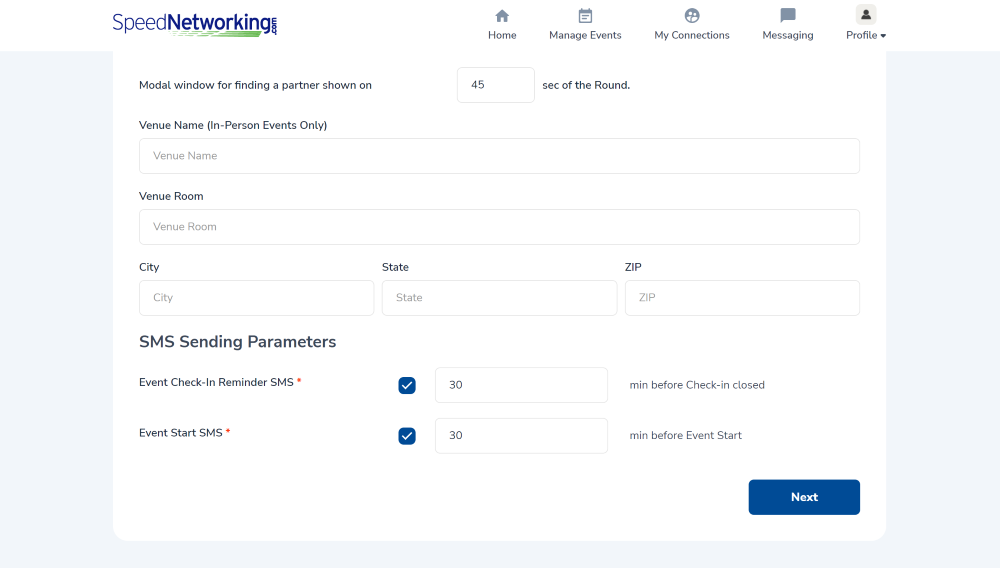
- Modal window for finding a partner shown - If the Enable Handle Dropouts / No Show Option is selected, this option determines how long to wait for a participant to join a meeting prior to attempting to re-pair. This time can be adjusted down to a minimum of 30 seconds in order to provide ample time for the other participant to join.
- Venue Name - This option applies to in person events and represents the name of the event (ie. the conference center or hotel).
- Venue Room - This option applies to in person events and represents the location of the event within the venue (ie. Ballroom A).
- City - This option applies to in person events and represents the city where the venue is located.
- State - This option applies to in person events and represents the state or province where the venue is located.
- Zip - This option applies to in person events and represents the postal code where the venue is located.
- Event Check-in Reminder SMS - If checked, you can customize a text reminder that will be sent to participants reminding them of the check in cutoff time in a later step of the Event Set Up
- Event Start SMS - If checked, you can customize a text reminder that will be sent to participants reminding them of the event start time in a later step of the Event Set Up
Warning
We recommend that participants register as far in advance to this time as possible, as a failure to register means that they will not be able to participate in the event.
Warning
The check-in process is very important and is separate from event registration. Participants that do not check-in will not be included in the meeting agenda and therefore will be unable to particiipate.
Note
Enabling this option allows participants to have a meeting during each scheduled time, but does not guarantee this as there may be no other participants that are also free. This also means that the repaired participants are not a strong match, as they will be matched with the highest scoring match of those participants that are available.
3.2 Matching Preferences
Once you have completed the Event Setup step, you will move on to the Matching Preferences screen. Matching Preferences allow you to define how participants will be matched for the event, starting with whether your participants can network freely with everyone (peer-to-peer, general networking) or if you need to divide your participants into two different types (i.e. buyers and sellers, mentors and mentees, etc.).
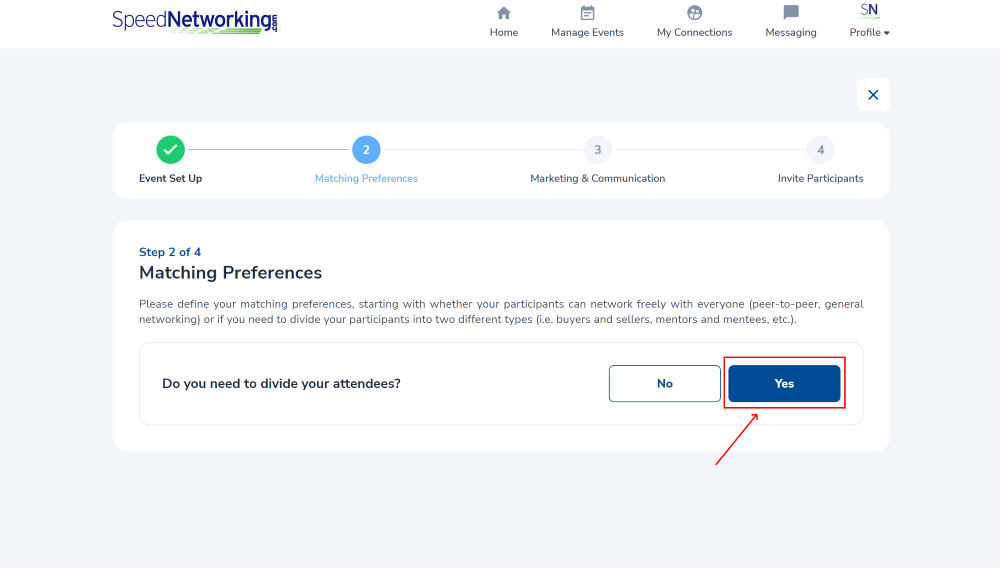
As this will be a Divider event, you will start by selecting No to the first question - Do you need to divide your attendees. Once selected, the rest of the screen will open up, as the information displayed is specific to Divider events. If you select No, the event would be a Peer-to-Peer event and the screen would request some of the same and some different information.
- Do You Need To Divide Your Attendees? - You will select Yes here.
As this is a divider event, you will need to start by establishing what two types of participants (groups) will be attending the event. For example, Buyers and Sellers.

The next section allows you to define a number of options for your two groups.
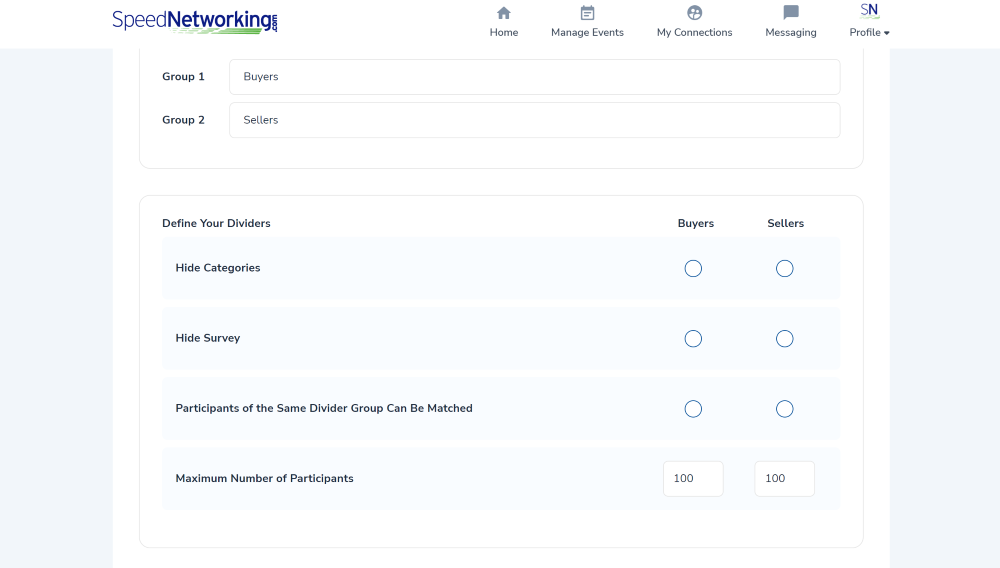
- Hide Categories - In Divider events, typically one group will answer the Category questions (see image below) during registration. Categories can be thought of areas of expertise, or areas that describe you. For example, if the category is "Products/Services", the Sellers would answer this as they are the ones that represent those options, and the Buyers would not. Therefore, you would Hide Categories for the Buyers.
- Hide Survey - In Divider events, typically the other group will answer which Category values they interested in meeting during (see below). For example, the buyers are the ones who rank their interest in the list of "Products/Services" (see image below), Buyers will be able to determine on the survey if they want to meet with sellers who represent these options. Therefore, you would Hide Survey for the Sellers.
- Participants of the Same Divider Group Can Be Matched - Typically you do not want either group to meet with other participants in the same group. For example, Buyers should not meet with Buyers. If this is the case, you will leave both options unselected. If you do want one of the two type of groups to meet with each other, you can select the option as applicable.
- Maximum Number of Participants - This option allows you to set how many participants of the same type of group will be allowed to meet with each other, and applies only if you allow participants from the same divider group to meet.
Note
Typically one type of participant will answer the category questions (Hide Survey), and the other will answer which participant categories they are interested in networking with (Hide Category). In some cases you will want both types of participants to answer the category questions AND determine which participant categories they are interested in networking with.
Note
If you are selecting either of the options here, you may consider running a Peer-to-Peer event.
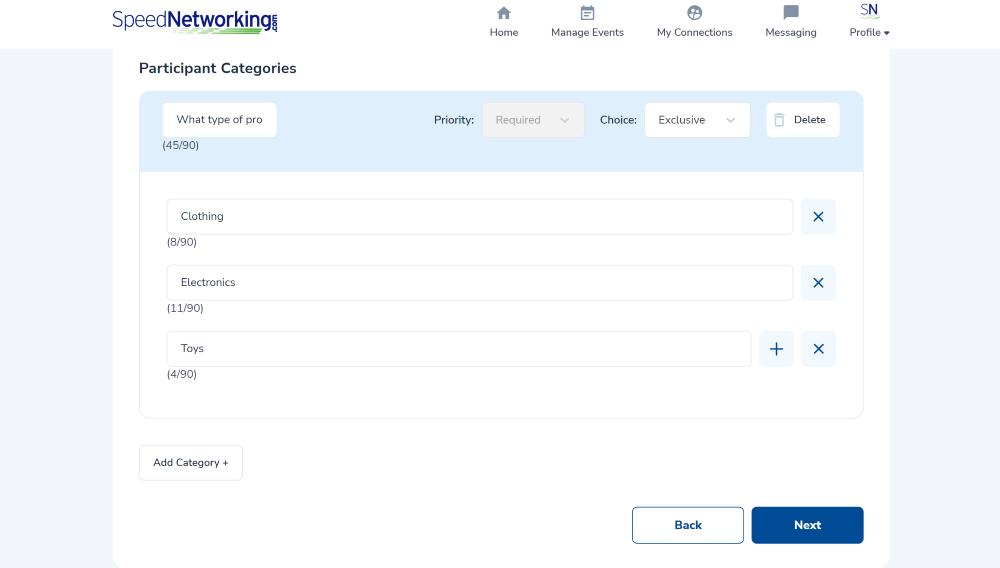
Categories are one of the most important variables in determining how participants will be matched. For example, in a Divider event, the category "What type of products are you looking to buy?" could have values of "Clothing, Electronics, Toys, etc.".
You can create as many categories of information you'd like for participants to complete during their registration. The more categories, the more finely tuned your matches will be.
- Category 1 - You are required to have at least one category. This text field is 100% customizable. Examples include:
- Type of products you are looking to buy
- Geographic location where products are manufactured
- Distributor price range of products
- Priority - You are not able to change the priority.
- Choice: The available options here are Exclusive or Multi-Choice
- Exclusive - Participants can only select ONE of the values available for the category.
- Multi-Choice - Participants can select one or more of the values available for the category.
- Delete - Allows you to delete the category if you decide you do not want to use it.
- Category Value - Also referred to as Sub-categories, these represent the values available for the category. Your category values are 100% customizable and should be as comprehensive as possible based upon the category value. For example:
- Category: What type of products are you looking to buy
- Category Values: Clothing, Electronics, Toys
- Add Category - You can add as many categories as you want.
One group of participants will identify which category value(s) they represent when they register for the event and the other will identify which type of participants they want to meet based on their selections.
Note
We recommend keeping the number of categories on the lower end, as you don’t want to create a situation where participants are so specifically categorized that they will never find a perfectly matched connection.
3.3 Event Registration
Once you have completed the Matching Preferences - Categories step, you will move on to the Event Registration screen. The registration information that is defined here will be completed by each group of participants when they register for the event and will be shared with each connection on the participant's schedule.
As this is a Divider event, each group will complete responses and may have different information requirements.
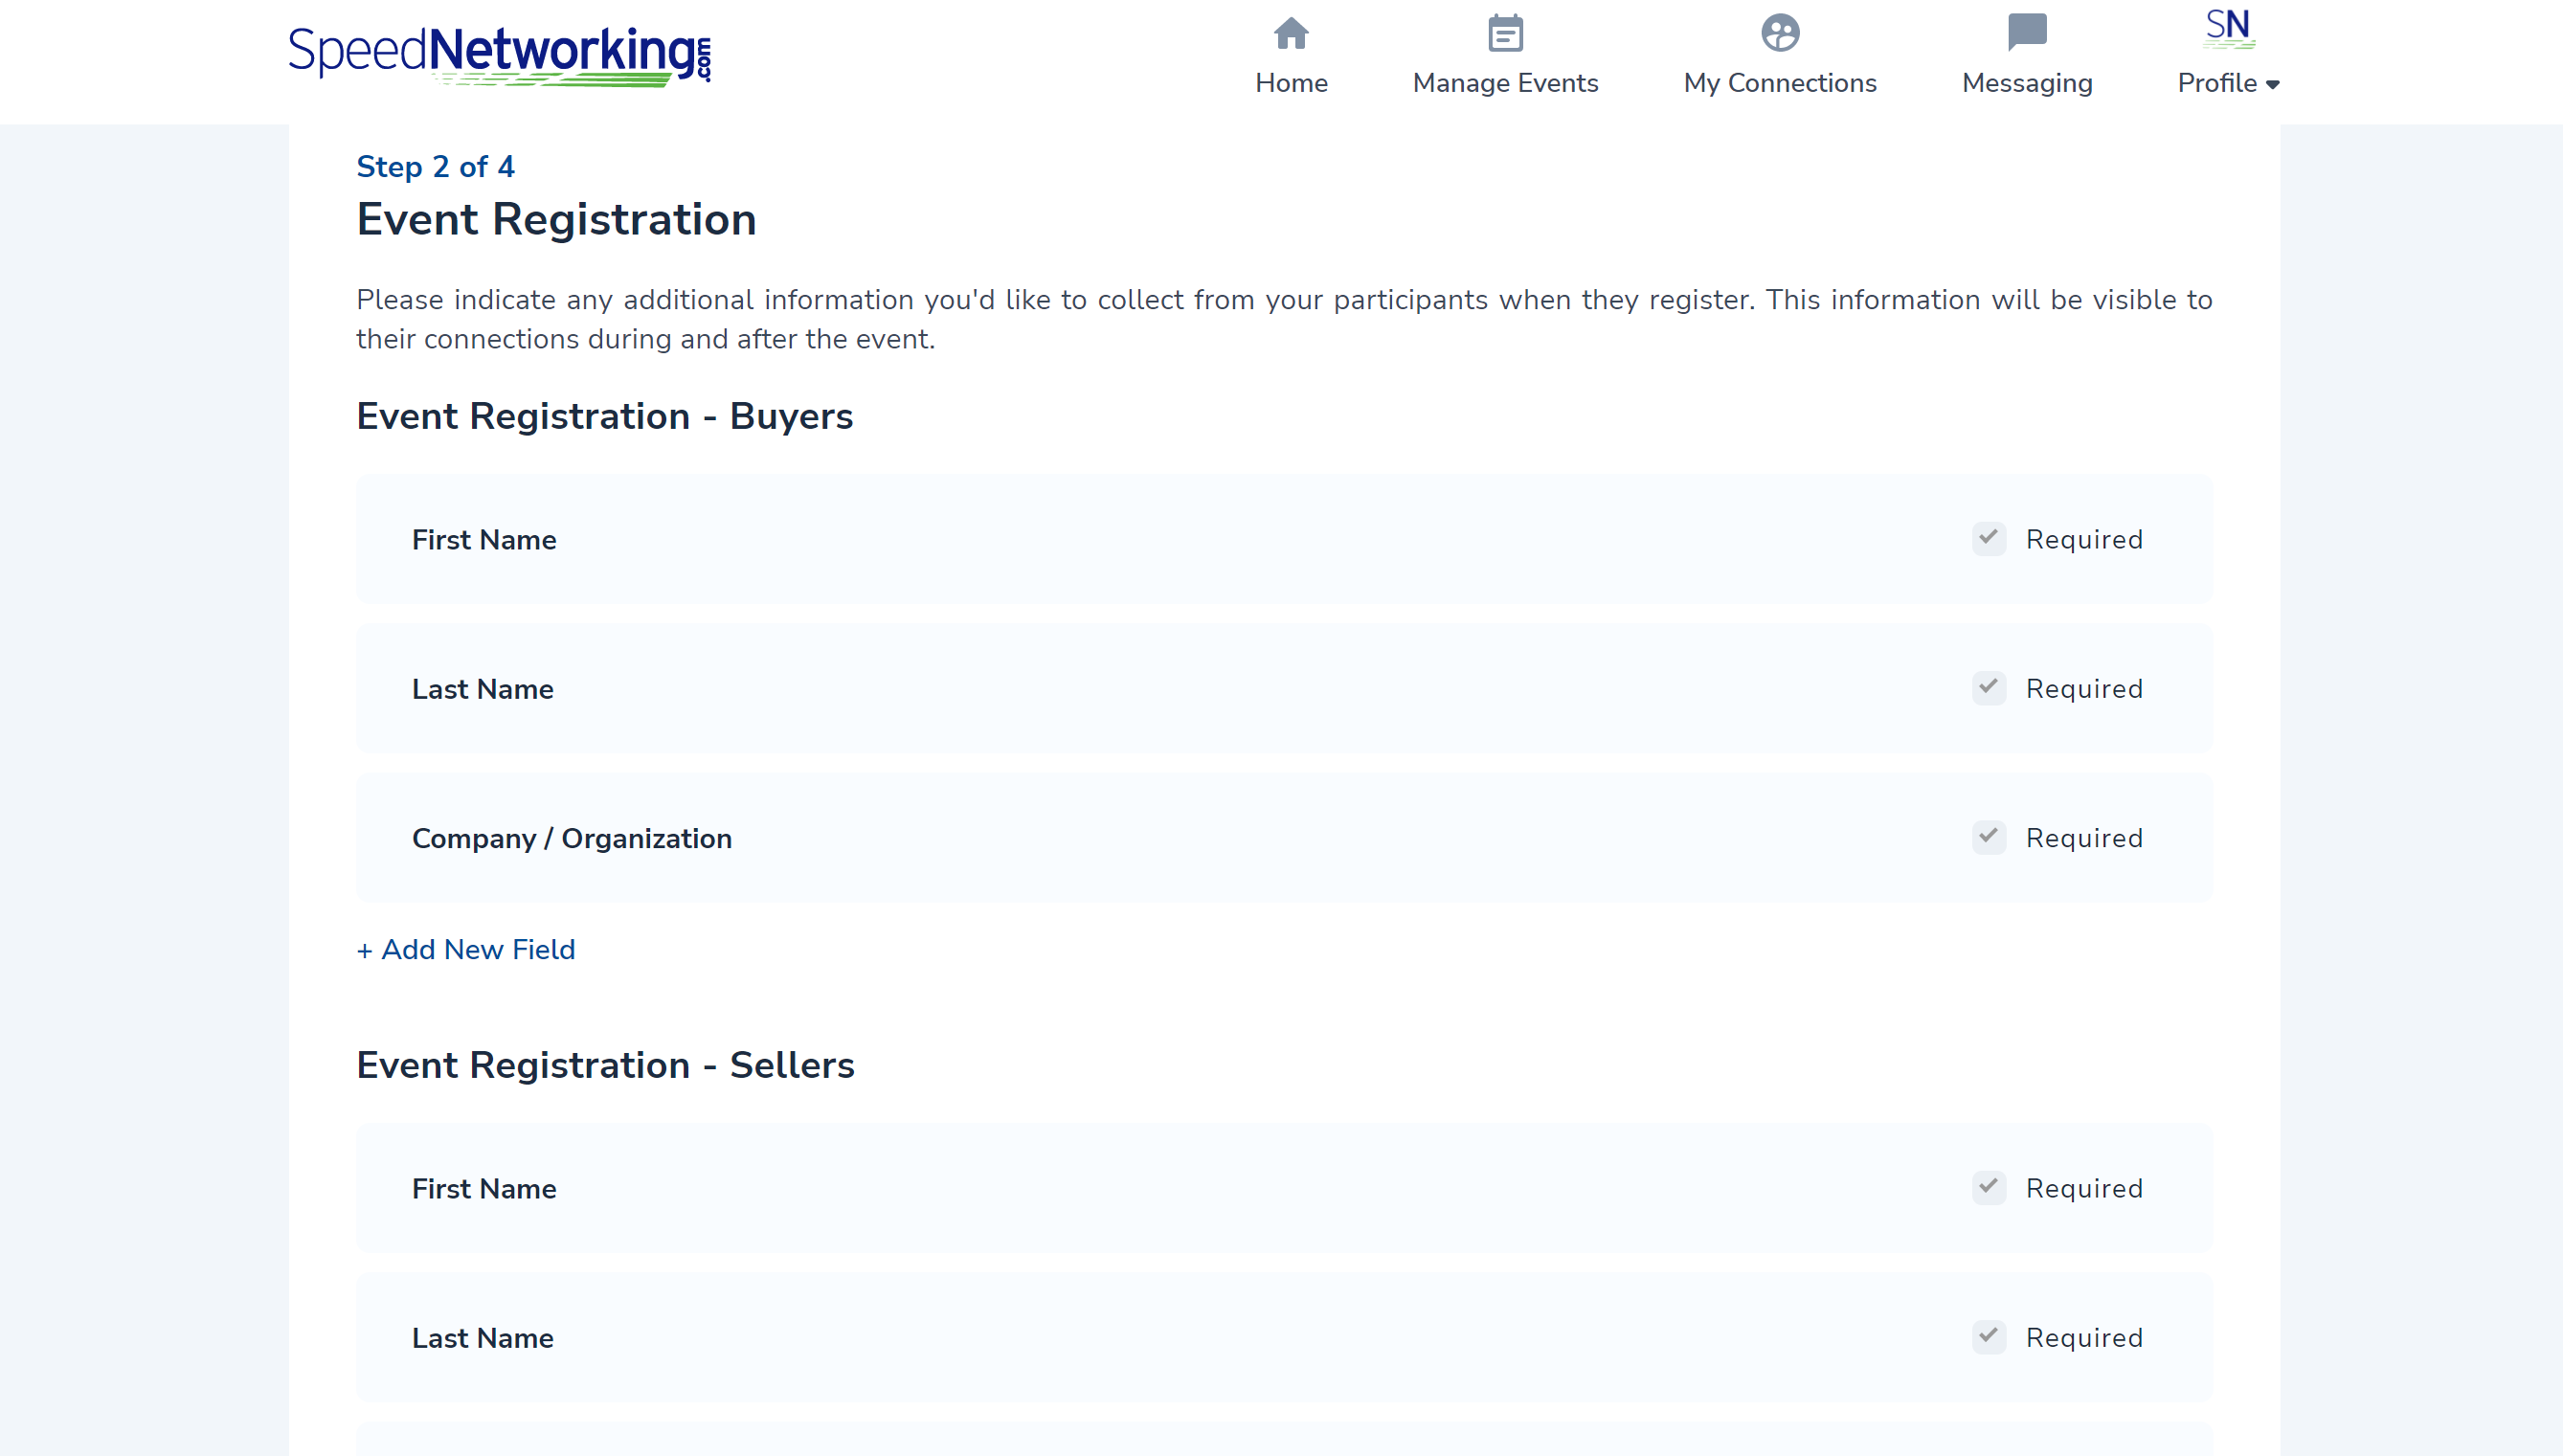
- First Name - This represents the registrating participant's first name, and is a required field.
- Last Name - This represents the registrating participant's last name, and is a required field.
- Company / Organization - This represents the registrating participant's company, and is a required field.
- Add New Field - You can add up to 10 additional fields.
Note
Remember that these fields are visible to other participants.
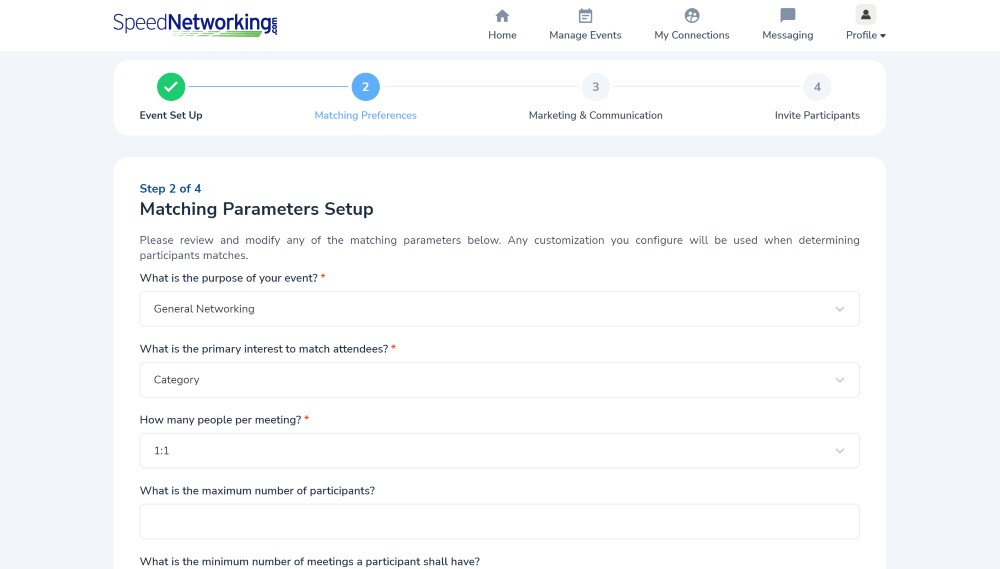
3.4 Matching Parameters Setup
Once you have completed the Registration step, you will move on to the Matching Parameters Setup screen. This section allows you to review and modify any of the matching parameters that will be used when determining participants' matching connections. You can customize how the algorithms run by modifying the values on this screen.
- What is the purpose of your event - This field will be set to General Networking and at the time this documentation has been created, there are no other values to select.
- What is the primary interest to match attendees? - This field will be set to Category and at the time this documentation has been created, there are no other values to select.
- How many people per meeting? - As we specialize in 1:1 networking, this field will be set to 1:1 and at the time this documentation has been created, there are no other values to select.
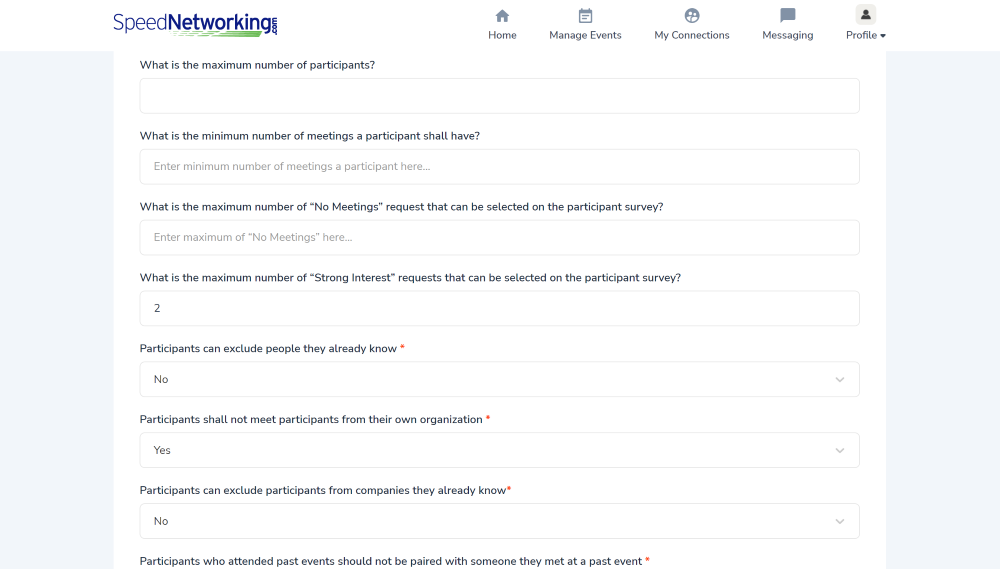
- What is the maximum number of participants? - This represents how many participants may register for the event before registration closes and no additional people can register.
- For virtual events, there is no maximum number.
- For in-person events, you should check with the venue to determine how many people are allowed in the venue room.
- What is the minimum number of meetings a participant shall have? - This determines how many of the total number of rounds that you would like to ensure your participants have a connection to meet with.
- You can enter the total number of rounds or any value less than the total here.
- As long as there are an even number of participants, the system will ensure that all partcipants have a match for each round.
- If there are an odd number of participants, there will be 1 person in each round that has an empty spot on their schedule.
- If there is a no show in any meeting and you have selected the option to repair in the event that this happens, than this participant may still have a meeting in this time slot.
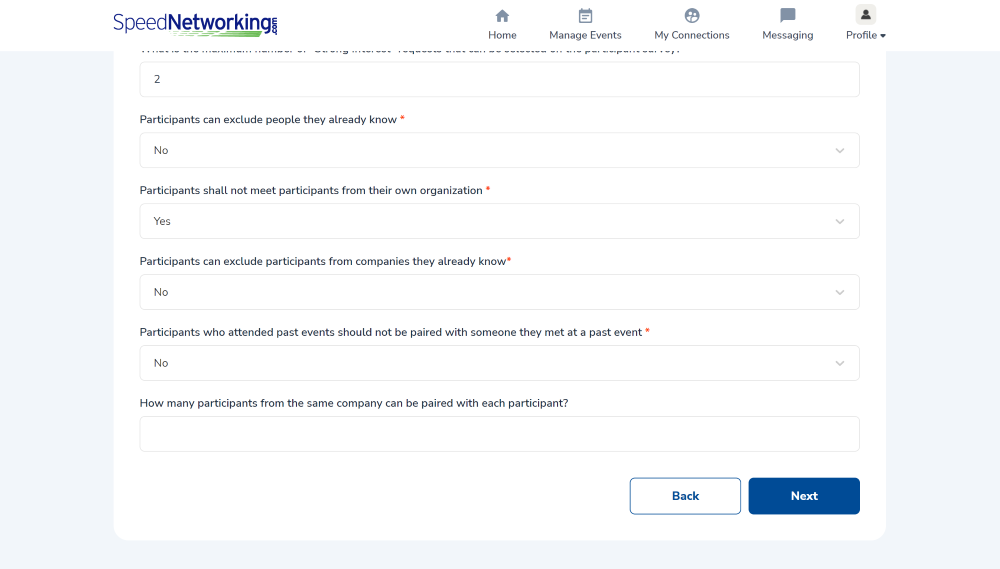
- What is the maximum number of "No Meetings" requests that can be selected on the participant survey? - This number prevents someone from selecting "no meeting" multiple times on the registration survey form. For example, if I select Accounting as my Job Function category value, I may not want to meet with anyone that has selected Sales as their job function.
- What is the maximum number of "Strong Interest" requests that can be selected on the participant survey? - This number prevents someone from selecting "5 stars" too many times. For example, if there are 4 Job Function category values, am I able to select all 4 as the highest interest (i.e. 5 stars)? As we want to make sure participants are accurately ranking their desired meetings, we recommend setting this value to 1 or 2.
- Participants can exclude people they already know - This determines if participants are allowed to select any other participant from the participant registration list that they do not want to meet at the event.
- Selecting YES will allow participants will see a full list of all registered participants. If they happen to recognize someone and do not want to be connected during the event, they can remove them from being considered.
- Selecting NO prevents participants from seeing the registration list, and their matches will be determined based on the algorithms and any matching configuration settings you have made.
- Participants shall not meet participants from their own organization - If your event is an internal event, then this should e set to NO. If this event brings together participants from multiple organizations, you can set this feature to YES to prevent co-workers from being connected with one another.
- Participants can exclude participants from companies they already know - This determines if participants are allowed to select any organization(s) from the participant registration list that they do not want to meet at the event.
- Selecting YES will allow participants will see a full list of all participant companies / organizations. If they do not want to be connected with any participants from any on the list during the event, they can remove them from being considered.
- Selecting NO prevents participants from seeing the registration list, and their matches will be determined based on the algorithms and any matching configuration settings you have made.
- Participants who attended past events should not be paired with someone they met at a past event - This determines if participants can meet with other participants that they have met in previous SpeedNetworking.com events.
- Selecting YES will exclude anyone that the participant has previously met from the matching algorithms.
- Selecting NO will include all participants in the matching algorithms.
- How many participants from the same company can be paired with each participant? - If you would like to restrict participants from meeting multiple people from the same company, you can set a value here of 1 or more. We recommend setting this value to 1.
Warning
Setting this number too high may result in the participant not being matched with strong connections.
Note
If you want to use this feature, we recommend turning it on 1 week before the event so that there will be participants to exclude.
3.5 Constraint Parameters Setup
Once you have completed the Matching Parameters Setup step, you will move on to the Constraint Parameters Setup screen. This section allows you to set up any additional constraints that you would like applied when participant matching is computed. This optional section gives you greater control on which participants are matched and which are not by allowing limits to be set on how many times a participant who has selected specific category values can meet with other participants that have selected specific category values.
For example, if you have a category for Office Location and have values of Chicago and New York, you can specify that no one from the Chicago office can meet with anyone else from the Chicago Office. In order to do this, you will select Category Office Location, Participant Value Chicago, Matched Value Chicago, Constraint Type No Match, Priority Required.
Warning
This section is defined for advanced matching and can produce adverse results if not set up properly. If you would like to modify the settings on this page, we recommend contacting SpeedNetworking.com for assistance.
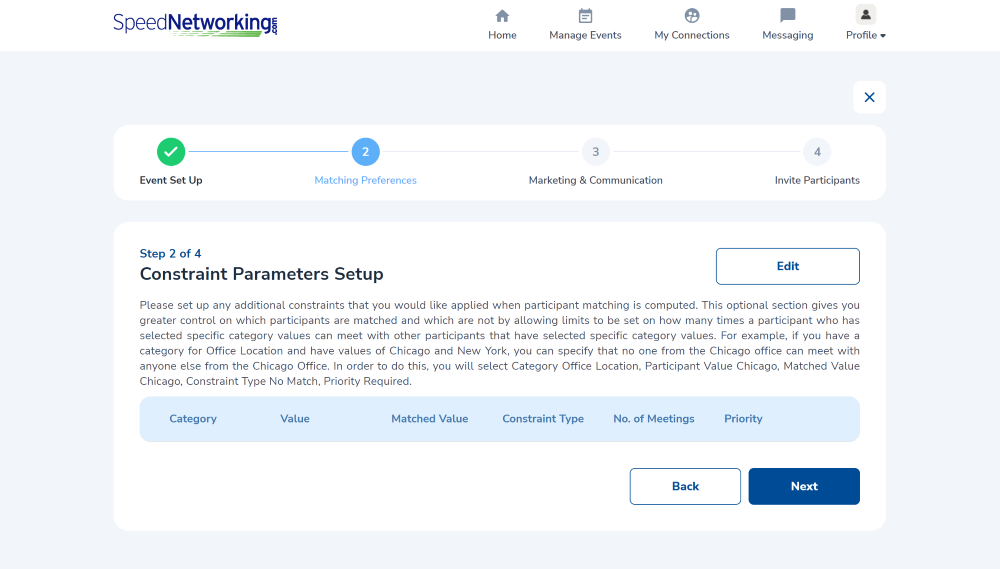
In order to get started, select the Edit button. This will add a + Add New Field link, allowing you to create additional constraints.
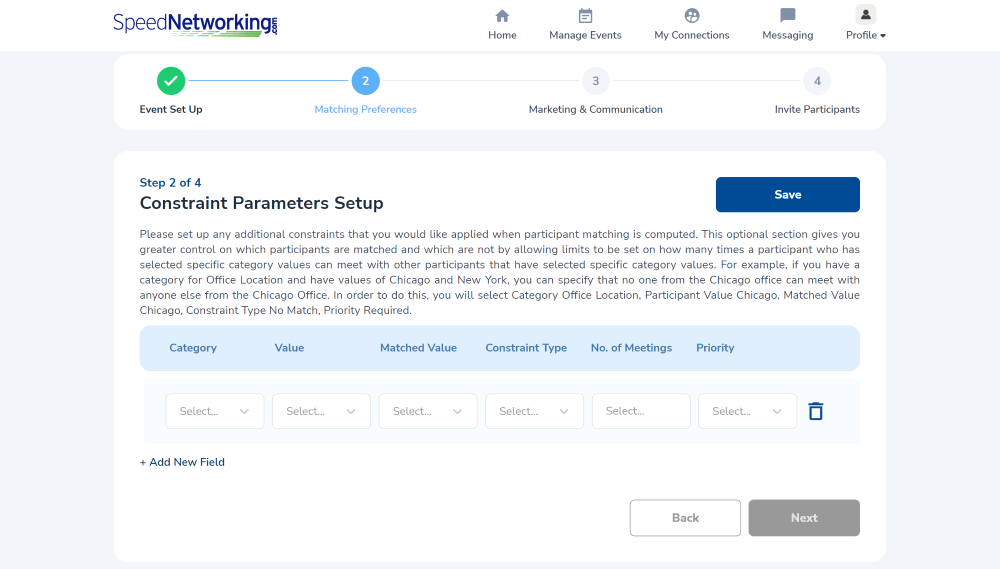
- Category - This dropdown will be populated based upon the matching category or categories that were set up in a previous step.
- Value - This dropdown will be populated once the Category is selcted and will display the category values there were set up for this category in a previous step.
- Matched Value - This dropdown will be populated with the same values as appear in the Value dropdown.
- Constraint type - This dropdown allows you to establish if the partipants with the value(s) selected will be matched or not, and if so, how many times.
- No More Than - Selecting this will allow participants with the values above to be matched, and will enable the No. of Meetings so that you can determine how many times someone with a Value can meeting with another participant that has the Matched Value.
- No Match - Selecting this will prevent participants with Value from matching with participants that have Matched Value.
- Priority - This dropdown allows you to place a weighting of how important this constraint is when running the matching algorithms.
- Low - Selecting this will enforce the rule but at the lowest priority, meaning other rules may prevent this one from being honored.
- Medium - Selecting this will enforce the rule at a higher priority than Low, but weighted as less important than High or Required constraints.
- Medium - Selecting this will enforce the rule at a higher priority than Low and Medium, but weighted as less important than Required constraints.
- Required - Selecting this will enforce the rule before any other constraints are applied.
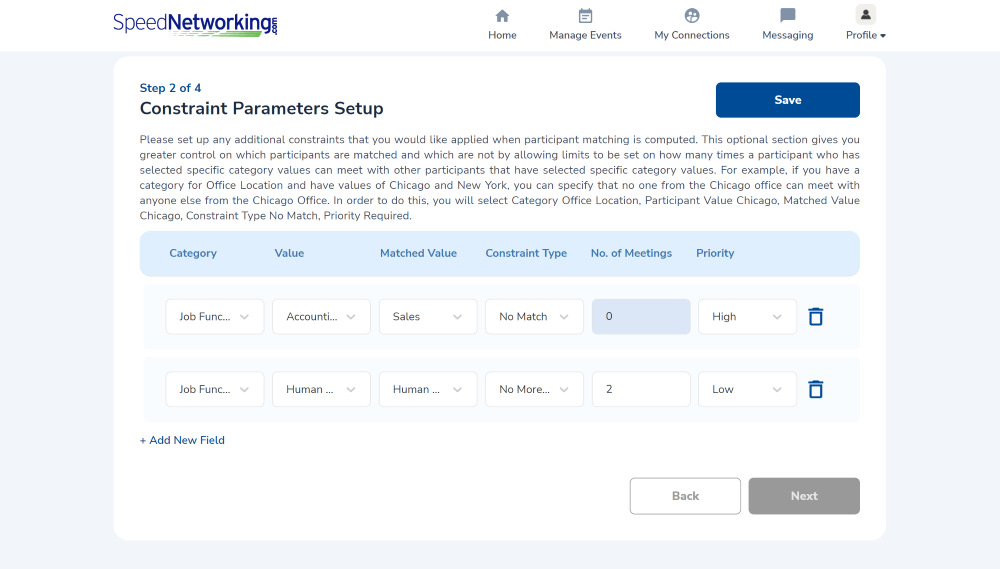
Once you have added all of your configurations, select Save
3.6 Marketing & Communication
Once you have completed the Constraint Parameters Setup step, you will move on to the Marketing & Communication screen. There are several marketing and communication settings that you are able to configure.
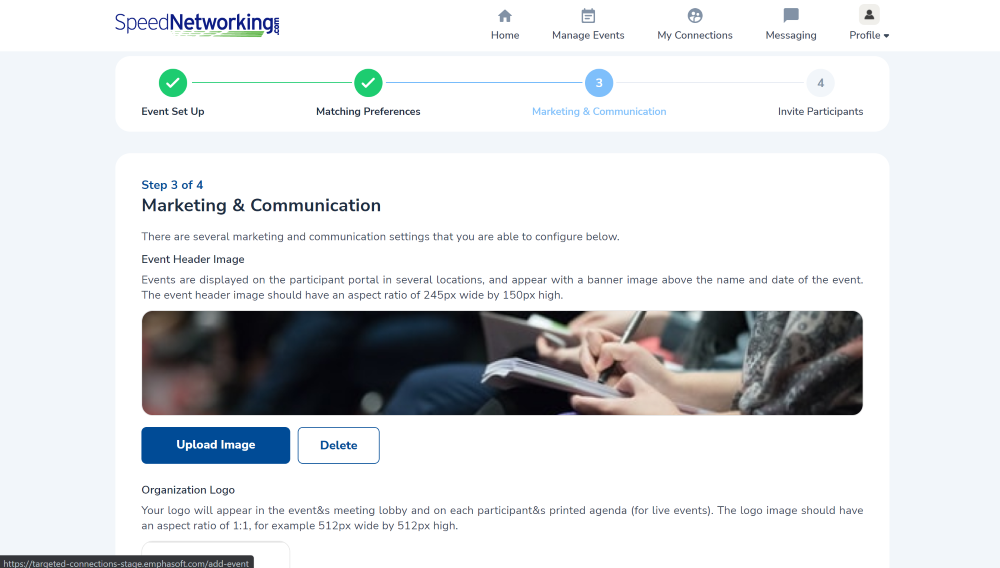
- Event Header Image - Events are displayed on the participant portal in several locations, and appear with a banner image above the name and date of the event.
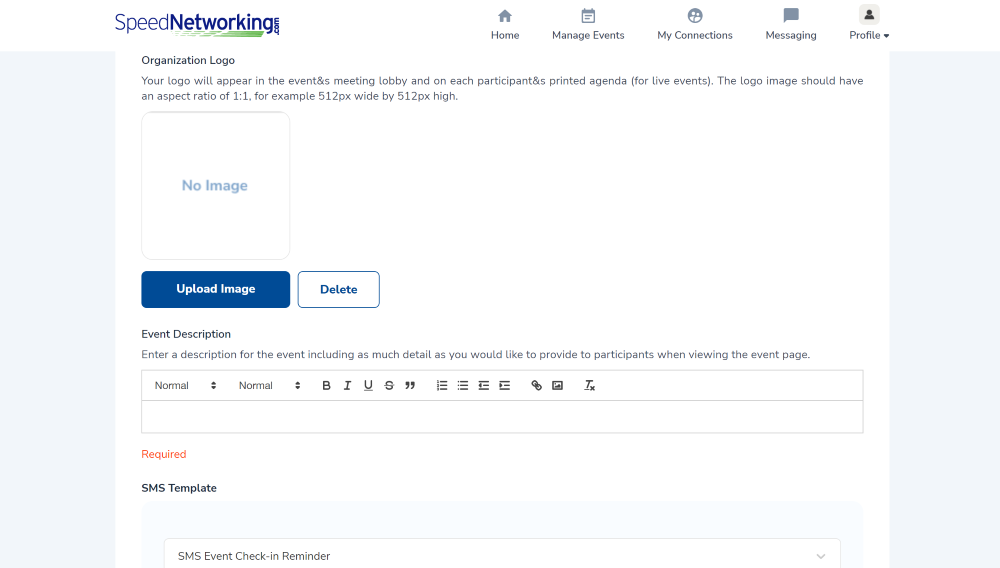
- Organization Logo - Your logo will appear in the event's meeting lobby and on each participant&s printed agenda (for live events).
- Event Description Enter a description for the event including as much detail as you would like to provide to participants when viewing the event page. This section typically includes a welcome message, instructions, and a timeline of the event.
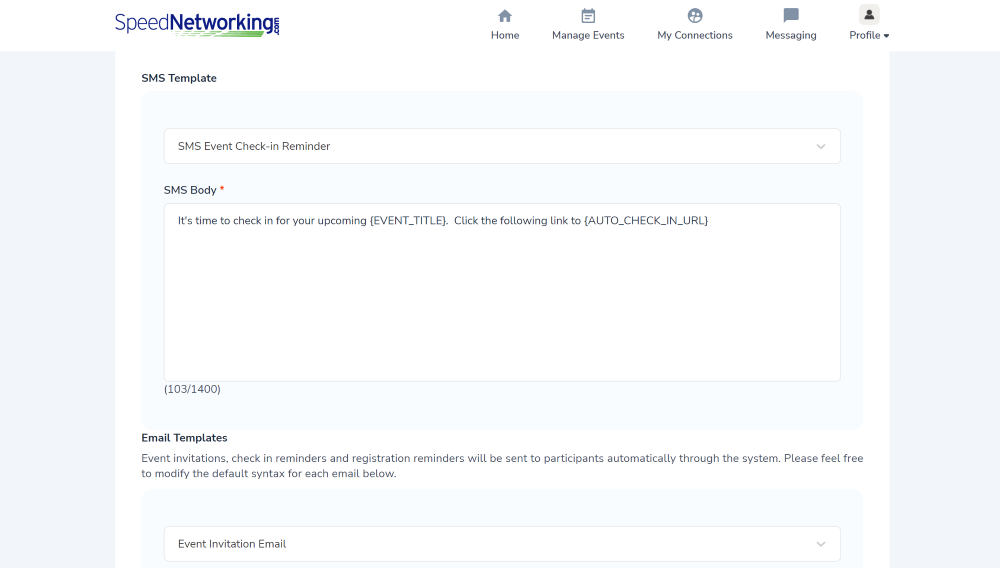
- SMS Template - check in reminders and registration reminders will be sent by SMS to participants who have opted in to receive text messages automatically through the system. Please feel free to modify the default syntax for each message below.
- {EVENT_URL} - This returns a link to the event details page.
- {AUTO_CHECK_IN_URL} - This returns a link to the event details page with automatic check in.
- {EVENT_TITLE} - This returns the title of the event.
- {SMS_START_REMINDER_TIME} - This returns how many minutes are left until the start of the event.
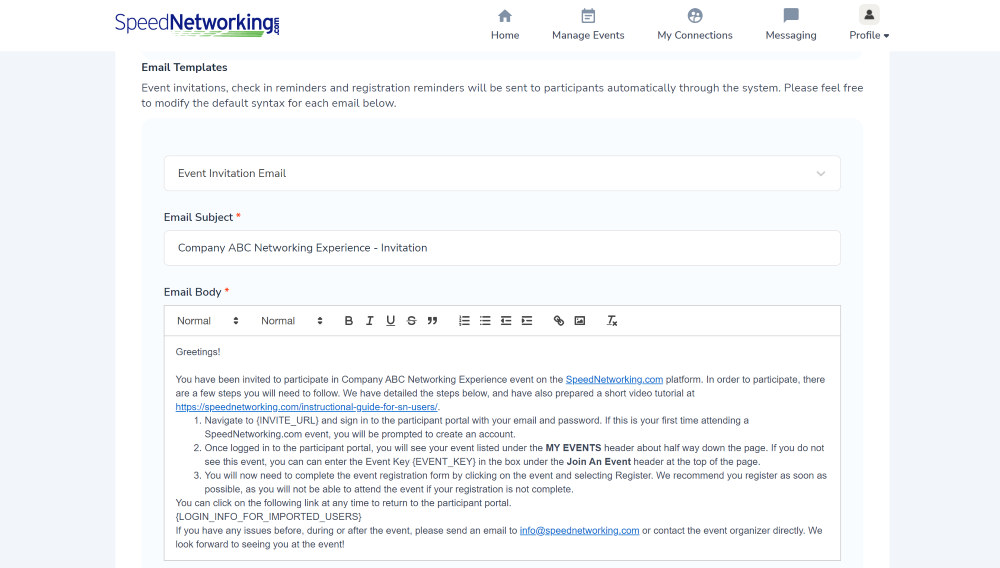
- Email Template - check in reminders and registration reminders will be sent by email to participants who have opted in to receive text messages automatically through the system. Please feel free to modify the default syntax for each email message below.
- {EVENT_KEY} - This returns the unique Event Key, which users can use to locate the event if they do not have the event URL.
- {EVENT_URL} - This returns the link to the event details page,.
- {AUTO_CHECK_IN_URL} - This returns the link to the event with automatic participant check in.
- {EVENT_TITLE} - This returns the title of the event.
- {EVENT_START_DATETIME} - This returns the start date and time of the event.
- {EVENT_START_DATE} - This returns the start date of the event.
- {EVENT_START_TIME} - This returns the the start time of the event
- {EVENT_END_DATETIME} - This returns the end date and time of the event.
- {EVENT_END_DATE} - This returns the end date of the event.
- {EVENT_END_TIME} - This returns the end time of the event.
- {EVENT_REGISTRATION_DEADLINE} - This returns the date and time deadline by which participants can register for the event.
- {EVENT_REGISTRATION_DEADLINE_DATE} - This returns the date by which participants can register for the event (date),.
- {EVENT_REGISTRATION_DEADLINE_TIME} - This returns the time deadline by which participants can register for the event..
- {EVENT_CHECK_IN_START_DATETIME} - This returns the start date and time when participants can check in for the event.
- {EVENT_CHECK_IN_START_DATE} - This returns the start date when participants can check in for the event.
- {EVENT_CHECK_IN_START_TIME} - This returns the start time when participants can check in for the event.
- {EVENT_CHECK_IN_END_DATETIME} - This returns the last date and time when participants can check in for the event.
- {EVENT_CHECK_IN_END_DATE} - This returns the last date when participants can check in for the event.
- {EVENT_CHECK_IN_END_TIME} - This returns the last time when participants can check in for the event.
- {EVENT_TIME} - This returns the start date and time of the event.
- {EVENT_VENUE_NAME} - This returns the event venue name.
- {EVENT_VENUE_ROOM} - This returns the event venue room.
- {EVENT_VENUE_ROOM} - This returns the event venue room.
- {INVITE_URL} - This returns the URL which leads the user to join to the event and open the event details page.
- If the user is not logged in, it will bring them to the sign in page, and after successful login, redirect to the event details page.
- If the user is not registered in the system, it will bring them to the registration page, and after successful registration, redirect to the event details page.
- {LOGIN_INFO_FOR_IMPORTED_USERS} - This returns the temporary login and password initially set for imported users.
Note
The event header image should have an aspect ratio of 245px wide by 150px high.
Note
The logo image should have an aspect ratio of 1:1, for example 512px wide by 512px high.
You may use the following variables within the body of the SMS message.
You may use the following variables within the body of the email message.
You may use the following variables within the body of the invite email message.
3.7 Invite Participants
Once you have completed the Marketing and Communication step, you will move to the final step - inviting participants to the event. You can enter individual email address or upload them from an Excel spreadsheet or comma delimited file.
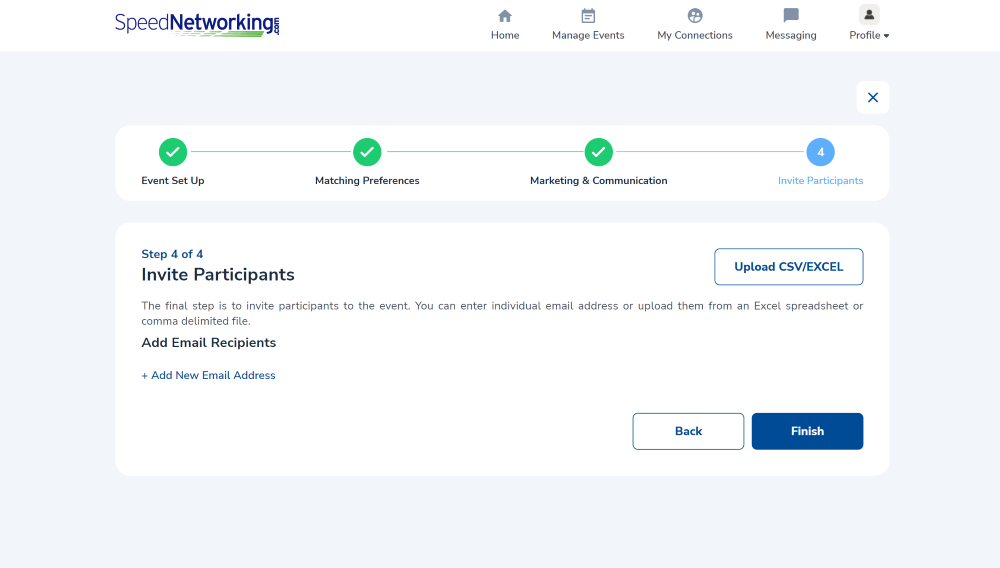
- Add Email Recipients - You can manually add one or more participant email addresses. Select the + Add New Email Address link to add additional emails.
- Upload CSV/EXCEL - Optionally, you may import your participant list from a spreadsheet file.
Warning
We strongly recommend that you skip importing your participant list on this screen and import your list from the Import Users tab of the Event Dashboard.
You have now completed the setup steps for the event! It's time to move to the Event Dashboard page, where you can further customize, monitor and administrate your event.